Hi! I’m John White from Brentacre Insurance, a family-owned business established in 1987, offering insurance solutions for modified cars, modified vans, and anything else that’s unusual or unique. The business employs mainly fellow petrolheads, so we can ensure we have full knowledge of the vehicles we are insuring.
I started work at the ripe old age of 16. In all honesty, I hated the boring world of insurance as it didn’t ignite my passions as I lived and breathed all things cars. For me, it all started with Mk 1and 2 VW Golf GTIs, Corrado, and especially the Rallye Golf G60.
However……I always had a dirty little secret!
VW and Ford fans don’t normally crossover in my experience, but I just loved the Escort Cosworth! There you go…..I’ve said it!
So, for the first time, I’m doing a blog introducing the world to my Ford Escort RS Cosworth.
Meeting My Hero, 25 Years Later
I’ve wanted one of these cars since they launched in 1992.
The whole concept of the car mesmerised me as a 17-year-old, but back then, affording one, never mind insuring one, was way beyond my capabilities.
Fast forward 25 years to 2017, where my life is filled with marriage, kids, a house, and life in general. I realised I still had an itch that needed scratching, and I finally succumbed and met my hero!
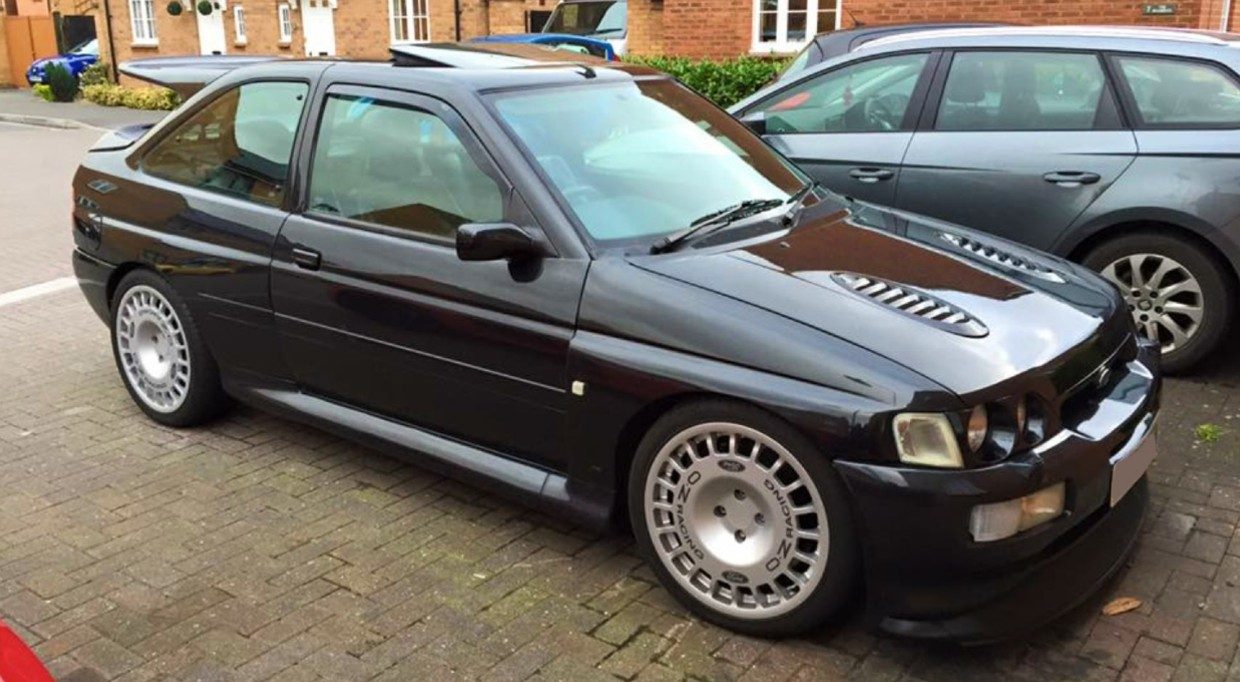
Here it is! My very own Cossy.
15 Owners, 400BHP & A Clock I Didn’t Trust
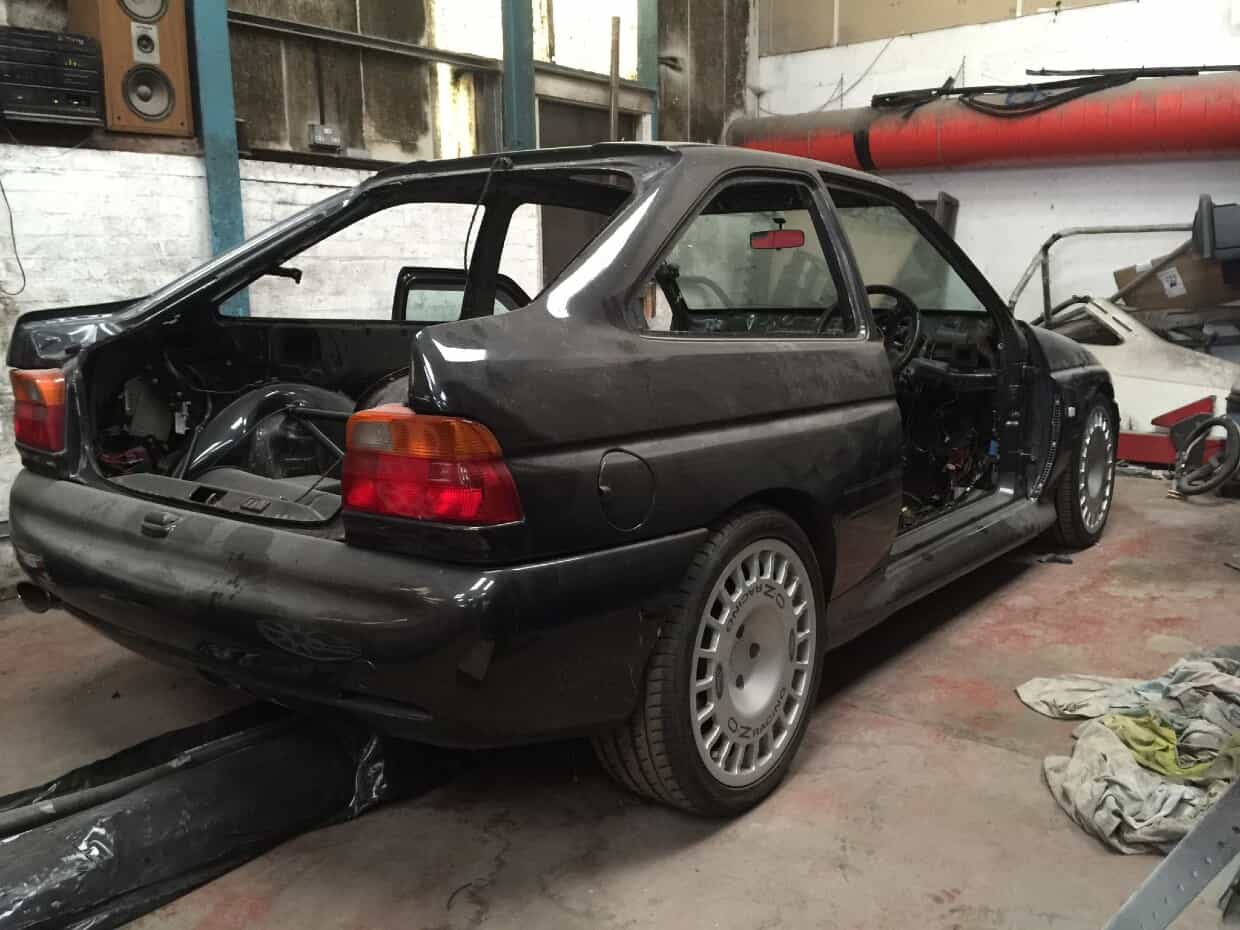
I bought the car from a lad in Devon – a 1995 Lux edition with leather Recaros, sunroof and a few mods such as AP brakes, 18-inch Comps and really bad coilovers.
It was running about 400bhp when I bought it, and it had had 15 previous owners and a very questionable clock. Basically, it was a bit tatty and needed some love!
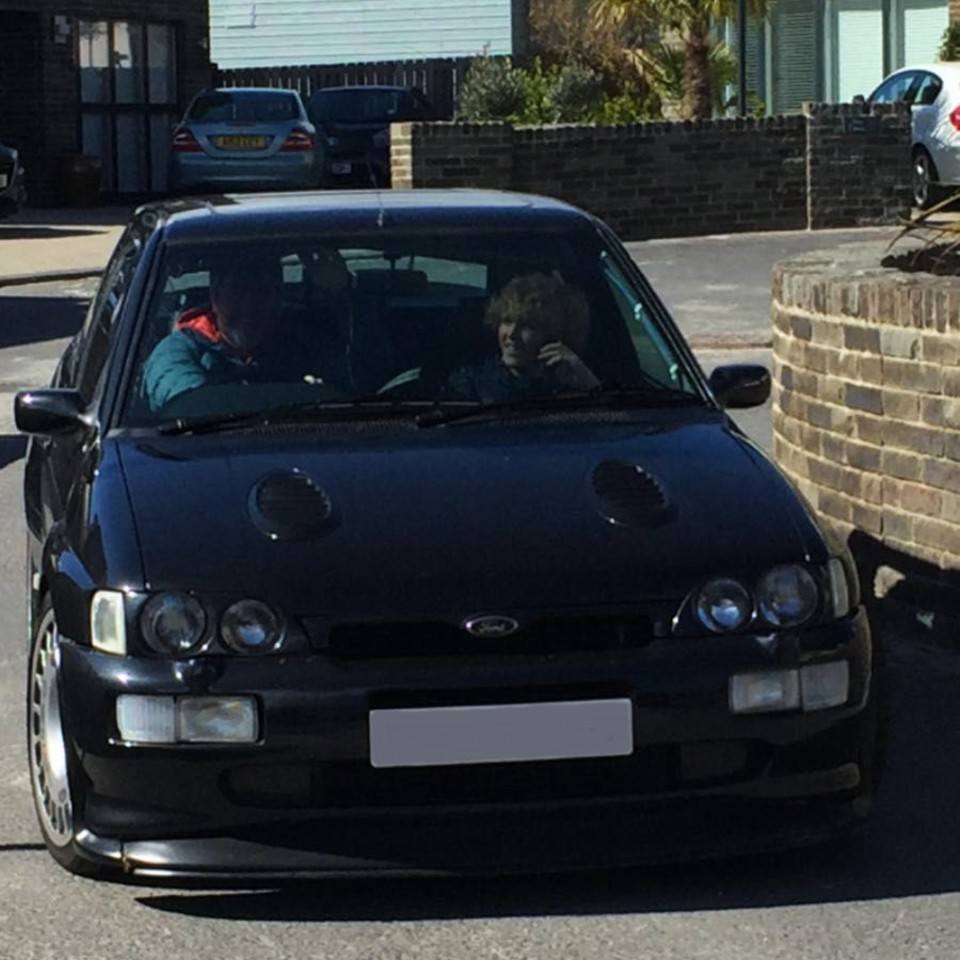
Driving It For The First Time
The first thing I noticed about the car was that it needed to be driven hard; otherwise, it just felt like any other Ford Escort. Nothing much happened below 3000 rpm – but when you went over that, it felt like the jump to light speed (a Star Wars reference), hitting the limiter in the next 3000 revs.
My dreams were being realised, although there was a very small window you could stay on boost, which I didn’t like. All those years of idolising the Escort Cosworth, only to feel a bit let down by the way mine drove.
It Wasn’t Perfect… But I Had A Plan
I realised a more standard version would have been an easier drive, so my brain started ticking on how I could make the car better and more drivable. There was no way I was going to give up after waiting 25 years for my Cossy – so I devised a plan 😂!
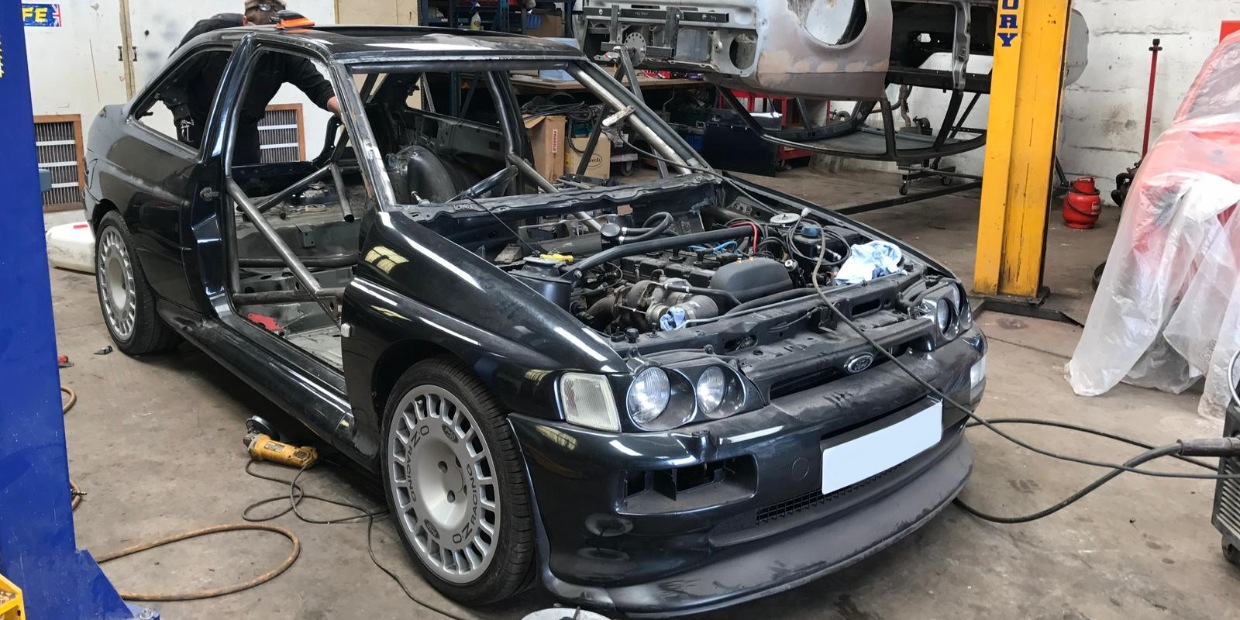
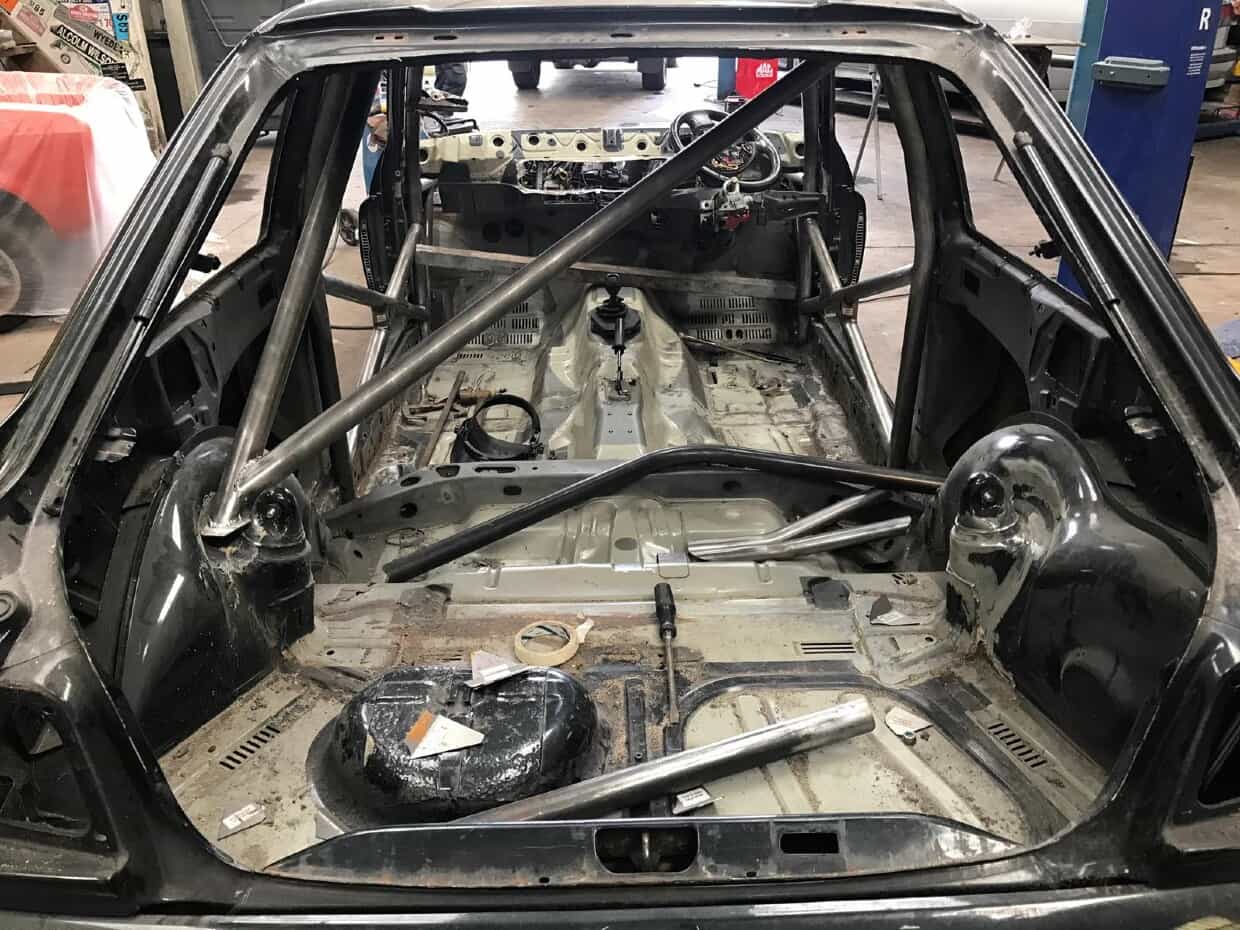
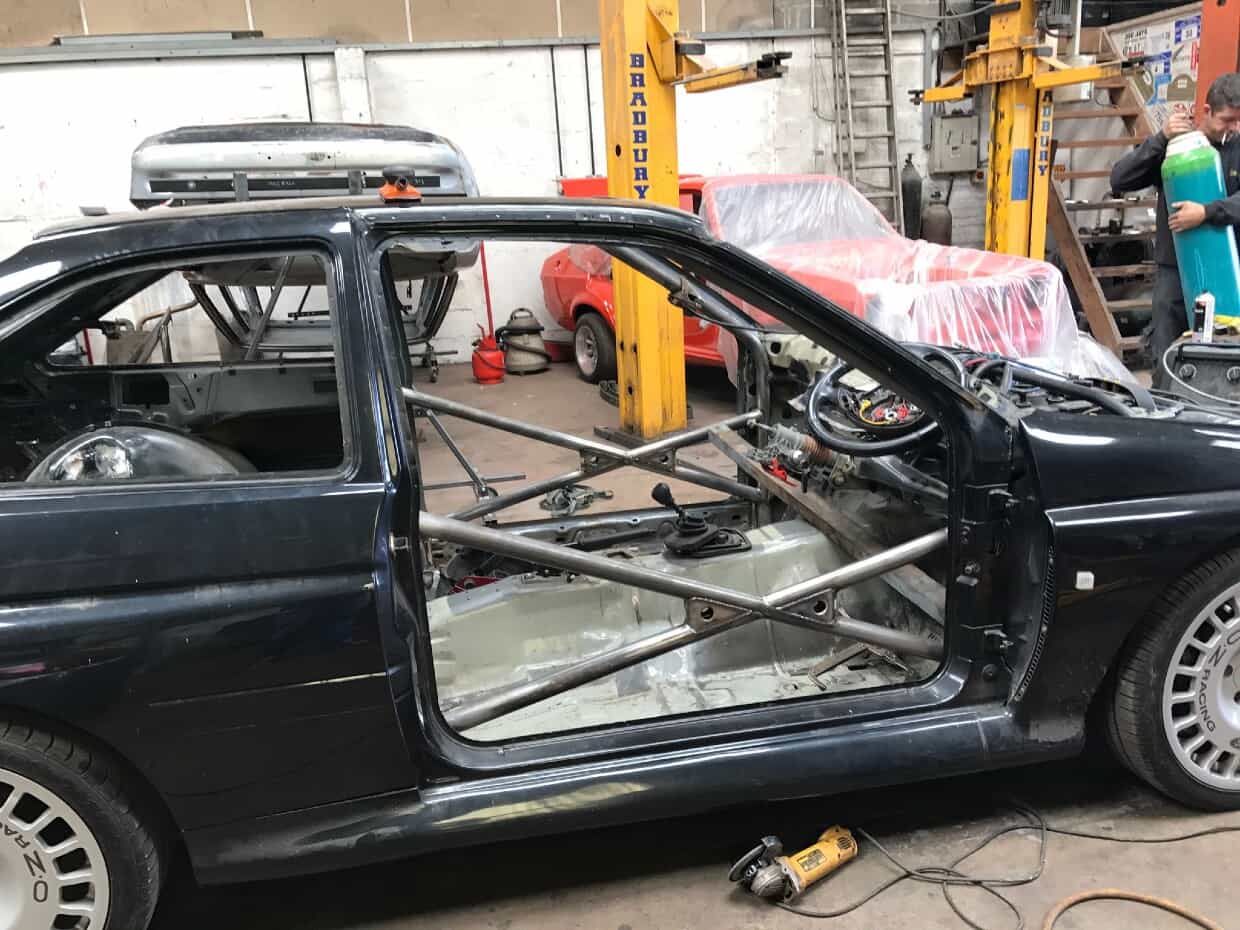
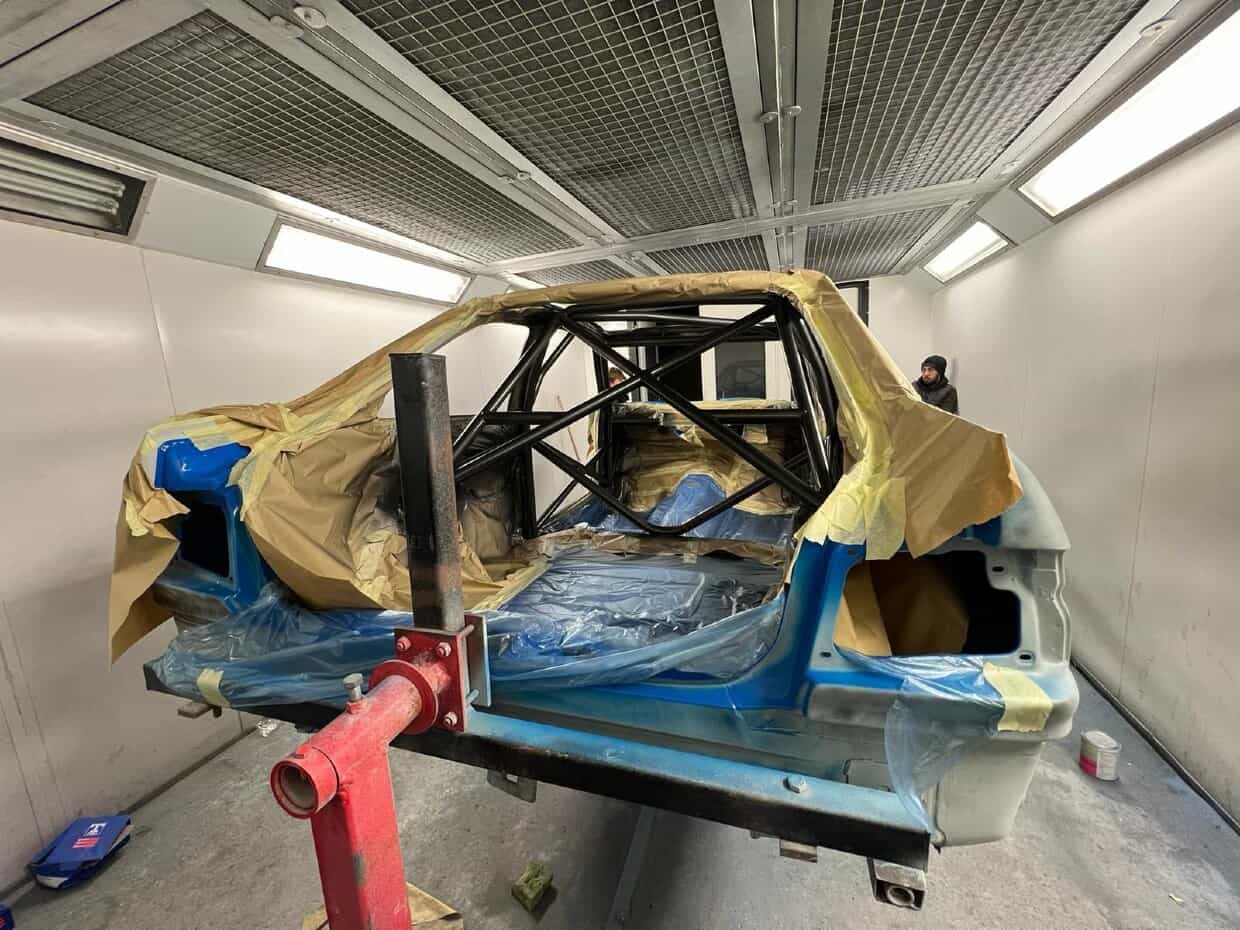
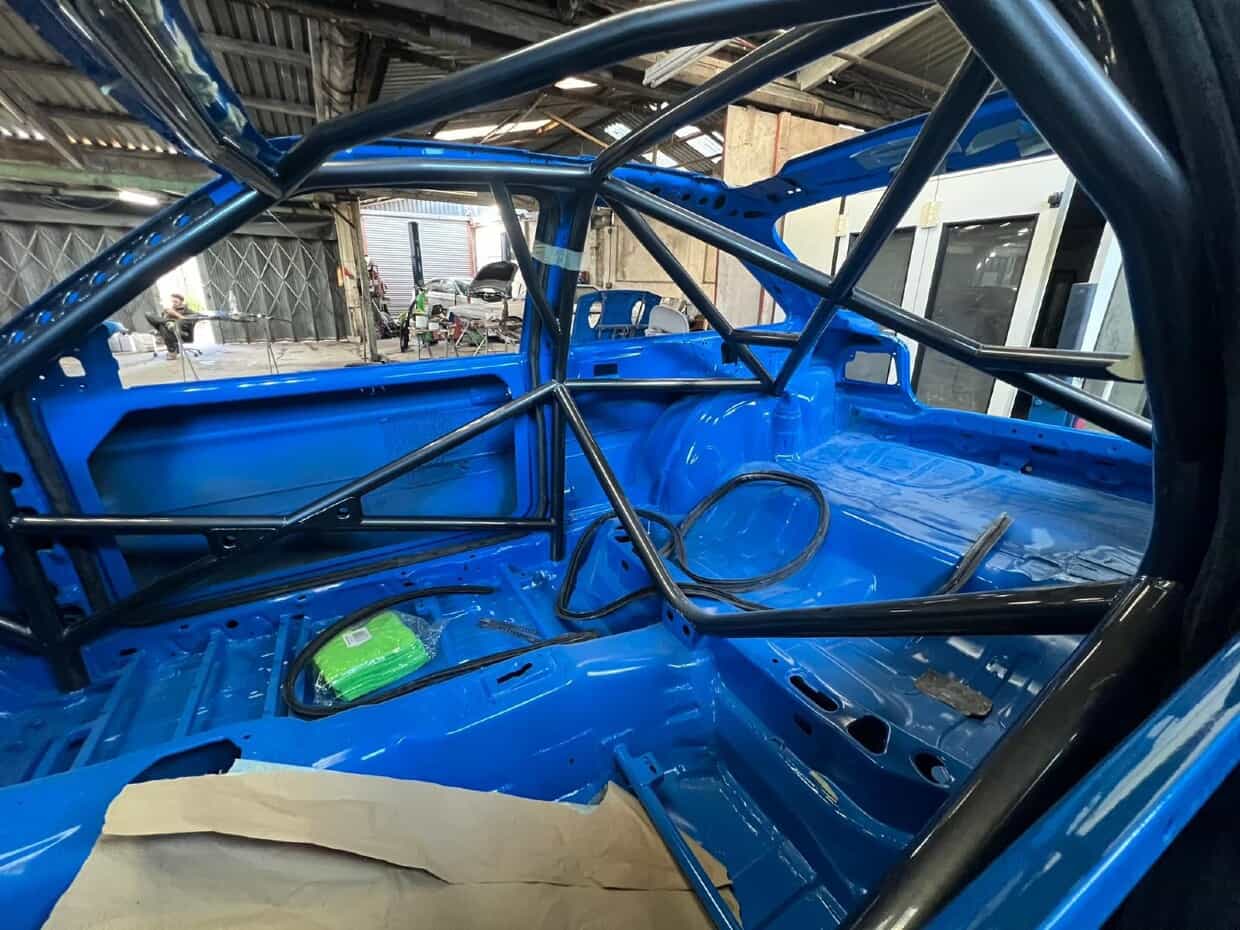
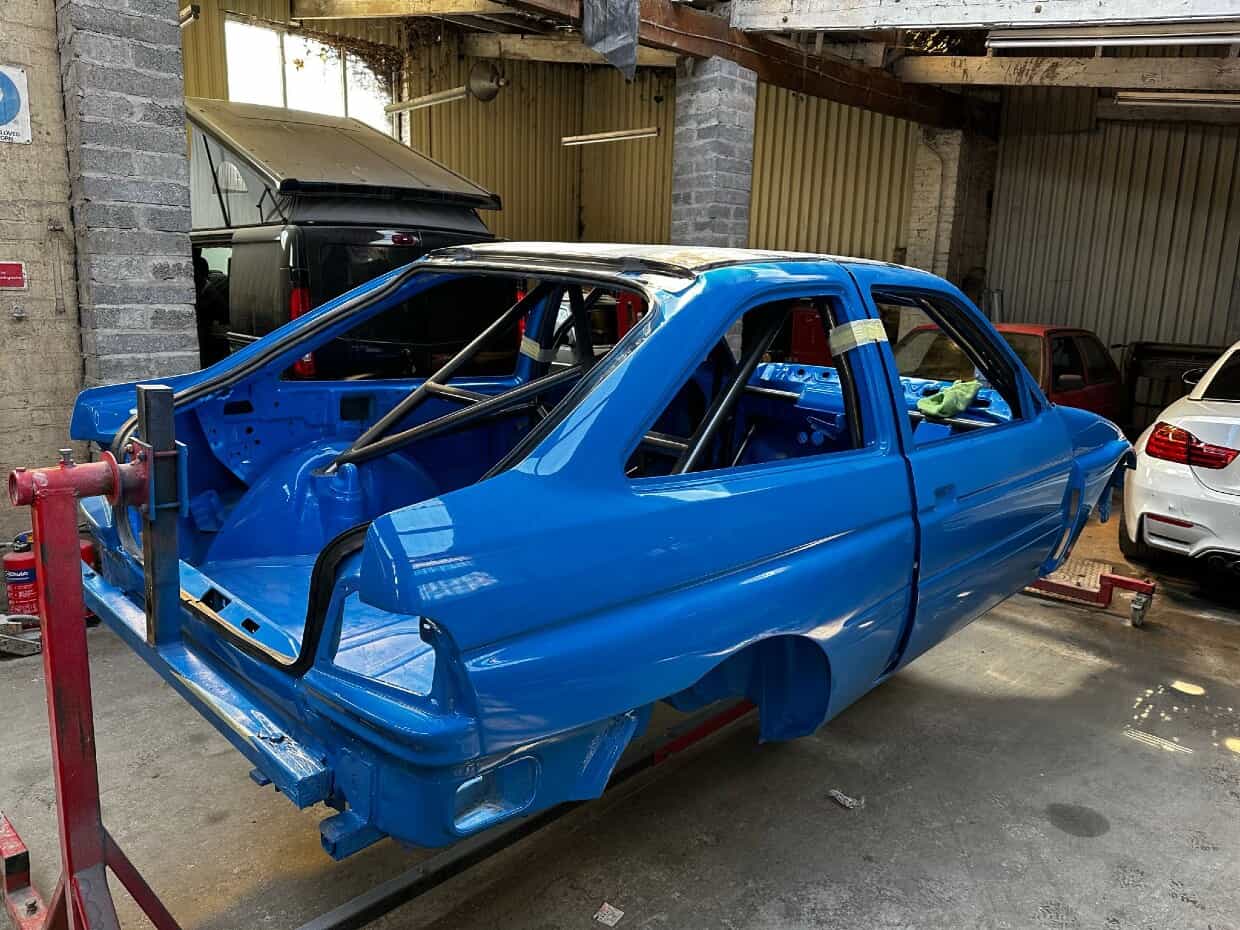
Full Roll Cage Welded In
With the initial strip-down underway, the first major upgrade was the cage. We installed a full weld-in roll cage from Safety Devices (the proper stuff), which runs through the bulkhead and into the engine bay. It’s a serious piece of kit that adds a huge amount of rigidity to the shell and, let’s face it, offers a lot of protection if things ever go sideways. The difference in feel once it’s in is unreal, the whole car just becomes sharper, tighter, and ready for real power.
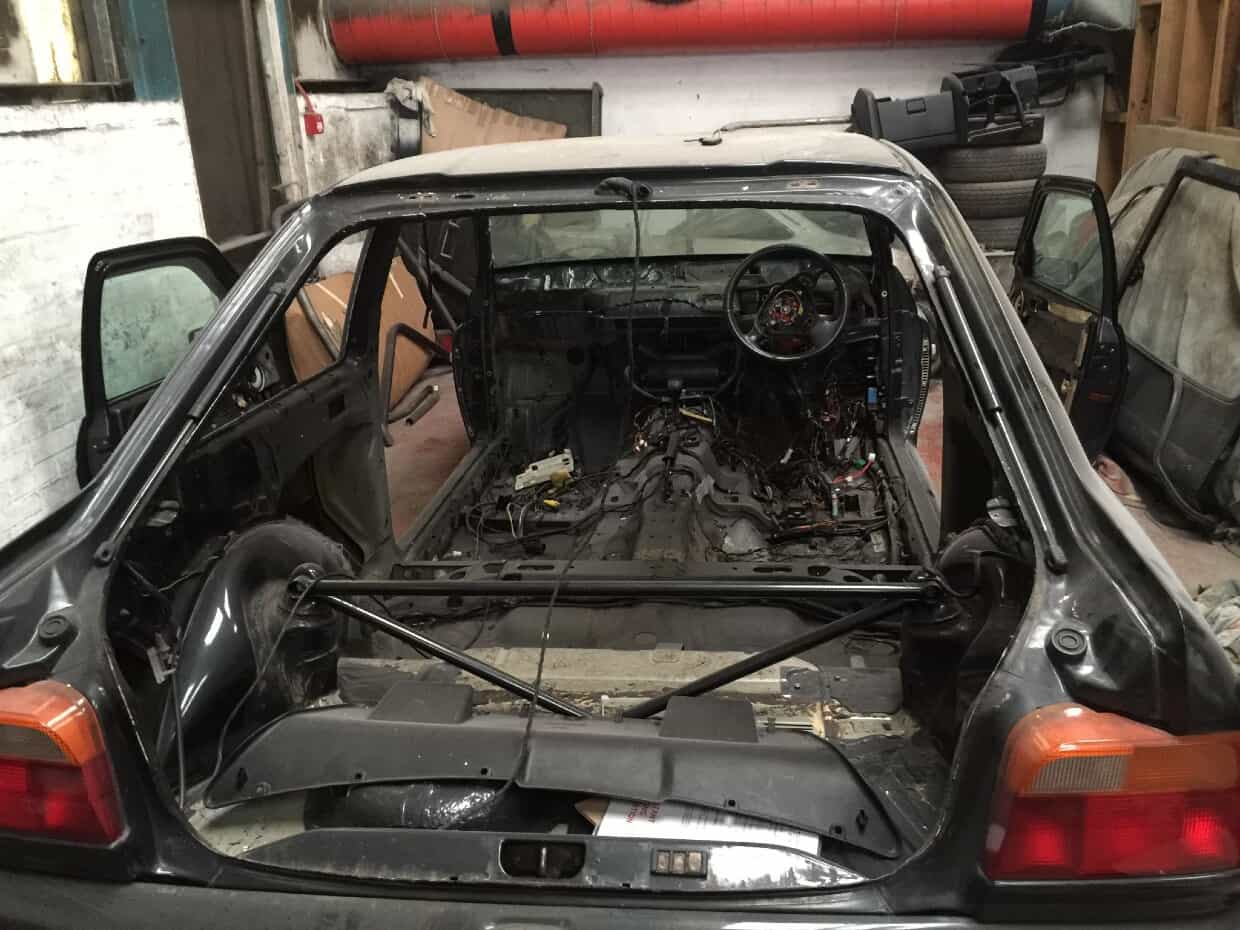
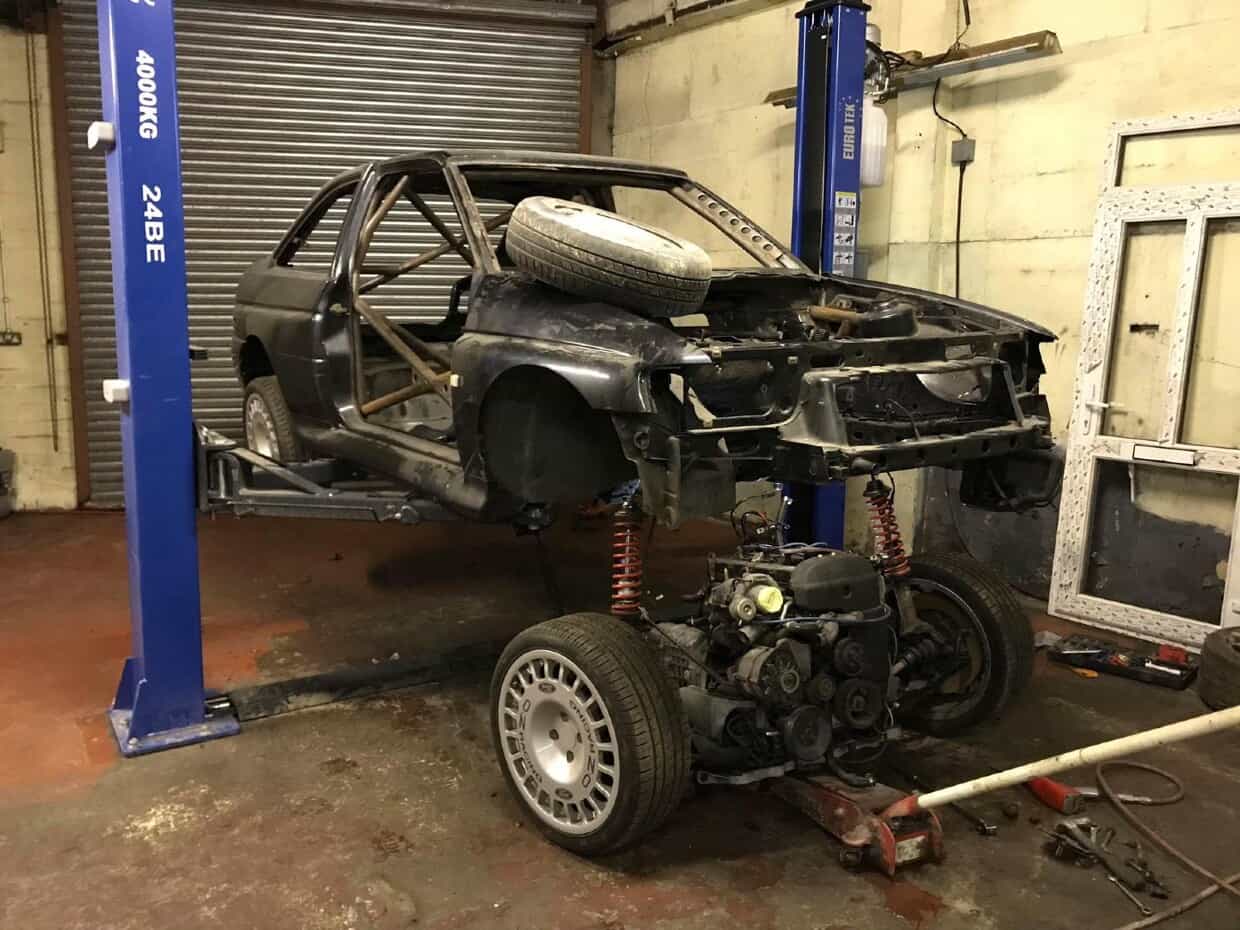
Stripping It Down to Build It Right
Once the cage was in place, we moved on to fully gutting the car. The engine, gearbox, and drivetrain were all unbolted and removed, leaving behind a bare shell that was ready for reinforcement and repair. This wasn’t a cosmetic restoration; it was a proper rebuild from the ground up. The next step was to stitch-weld the shell to reduce flex and lay the foundations for a car that would handle every bit as well as it looked.
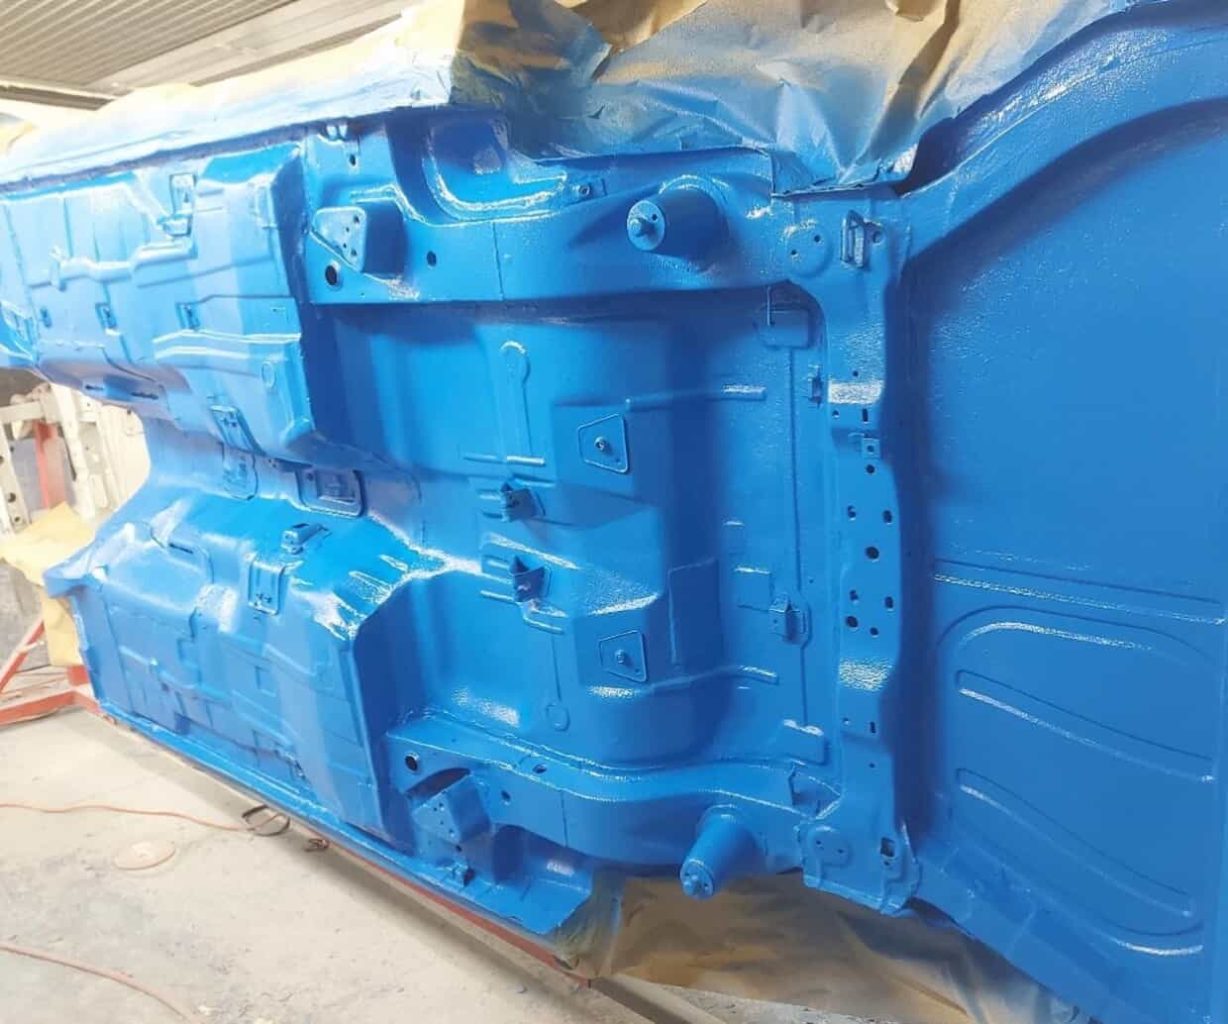
Sandblasted, Cleaned & Ready
Once everything was out, the shell was completely sandblasted to strip away any rust, dodgy repairs AND years of underseal. It wasn’t a nice job, a horrible task if we’re honest, so full credit to Mike for smashing through it. What we ended up with was a bare, honest Escort shell, ready to be brought back to life the right way.
Enter Sterling – Master of Metal
At this point, my good mate Sterling took over. A proper craftsman who grew up in his dad’s bodyshop, the old BT Rees in Swansea, run by the late Derek Jenkins (RIP ❤️). Sterling’s been around panels and paint all his life, and it shows. Watching him work was a pleasure.
He cut out the rust and poor repairs, flattened the boot floor to accommodate the new petrol tank, and stitch-welded the whole shell for added rigidity. No corners were cut. No filler jobs. Just real metalwork, done properly.
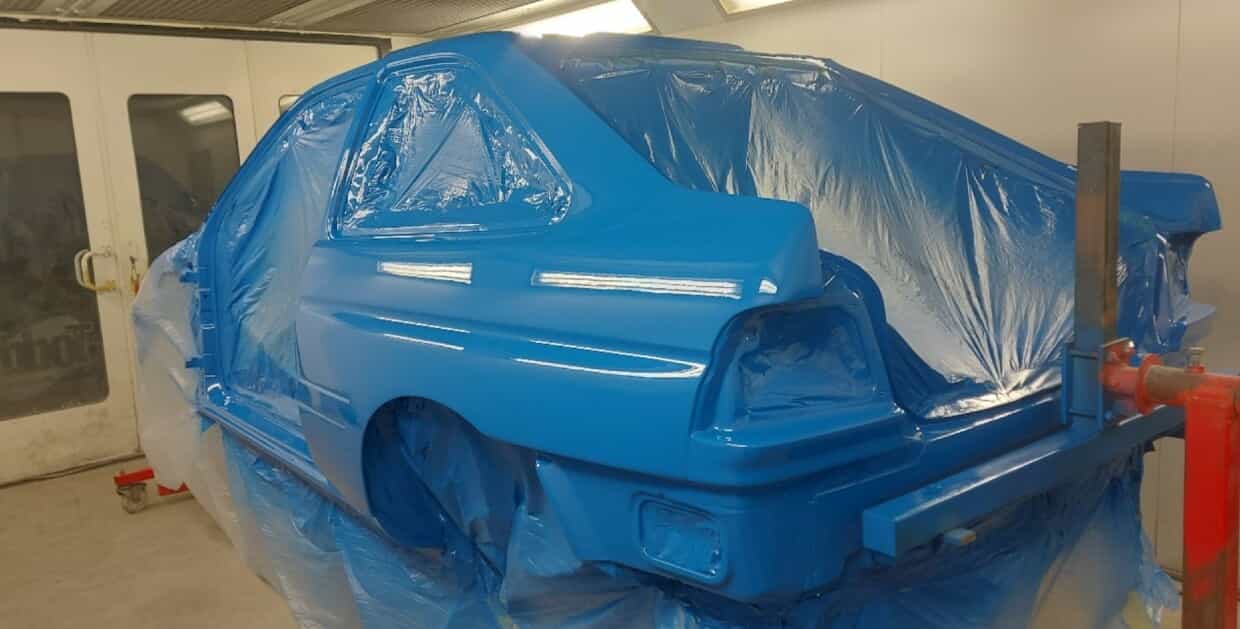
Purists – Close Your Eyes – Porsche Paint
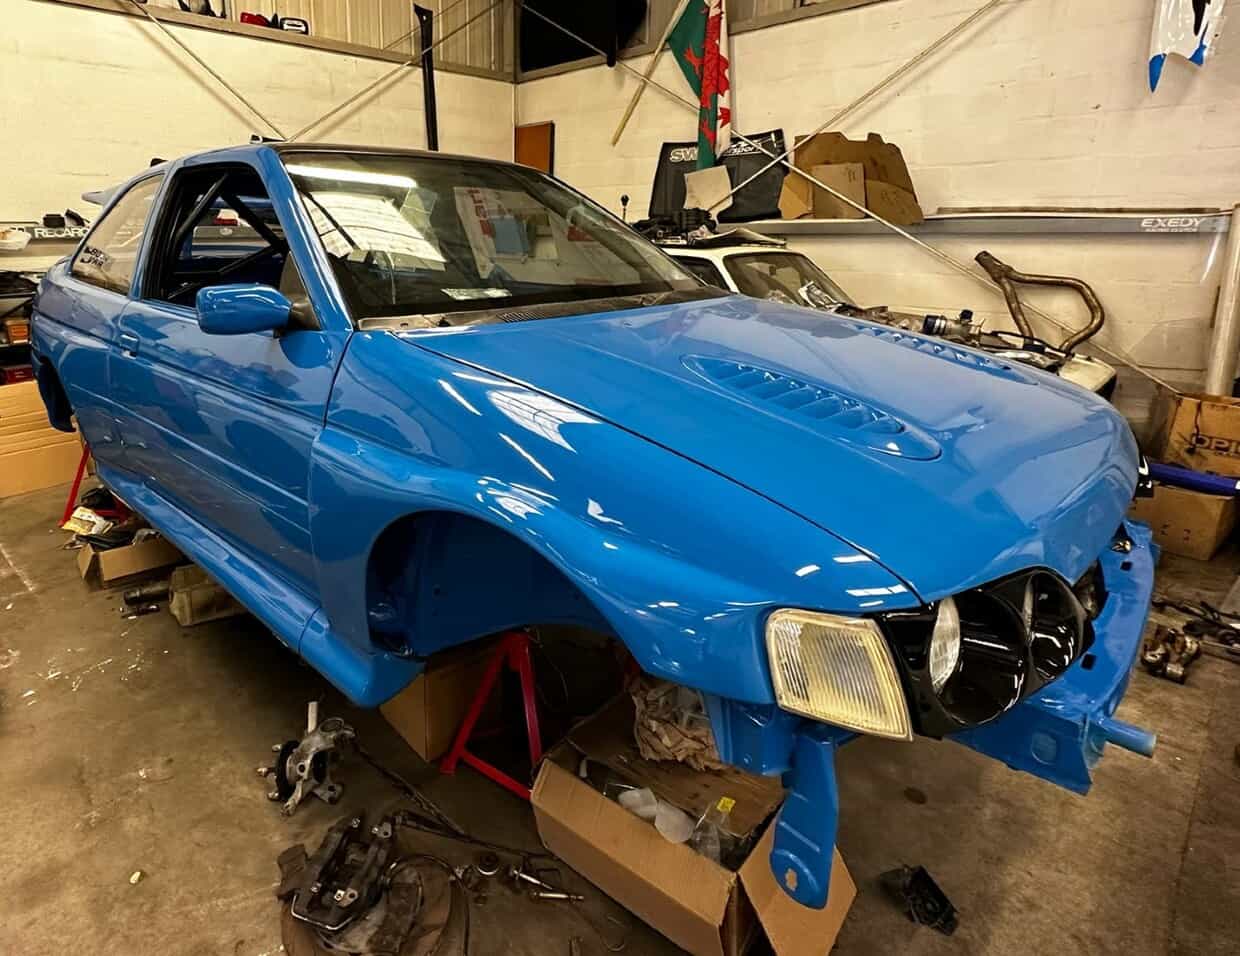
This is where the purists might look away because I’m not one. Sterling laid down one of my all-time favourite colours: Porsche Voodoo Blue for the shell and Porsche Grey for the cage. It’s bold, it’s vibrant, and I have zero regrets. The entire paint process took serious time, but the quality of workmanship is second to none.
Piecing It Back Together
With the shell painted and prepped, the rebuild phase finally started, and that’s where things started to get exciting.
WRC Carbon Kevlar Front Wings Painted
One of the first components to receive treatment was the carbon Kevlar front wings, based on WRC specifications. Lightweight, strong, and finished in fresh Voodoo Blue, they were painted up and ready to be fitted.
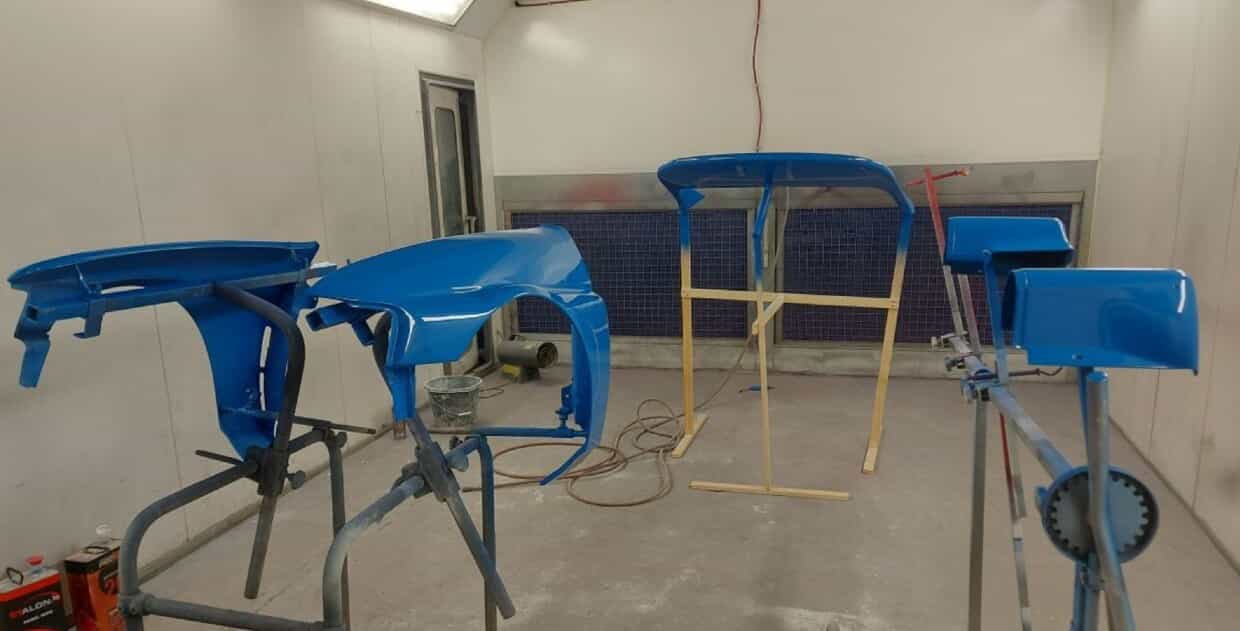
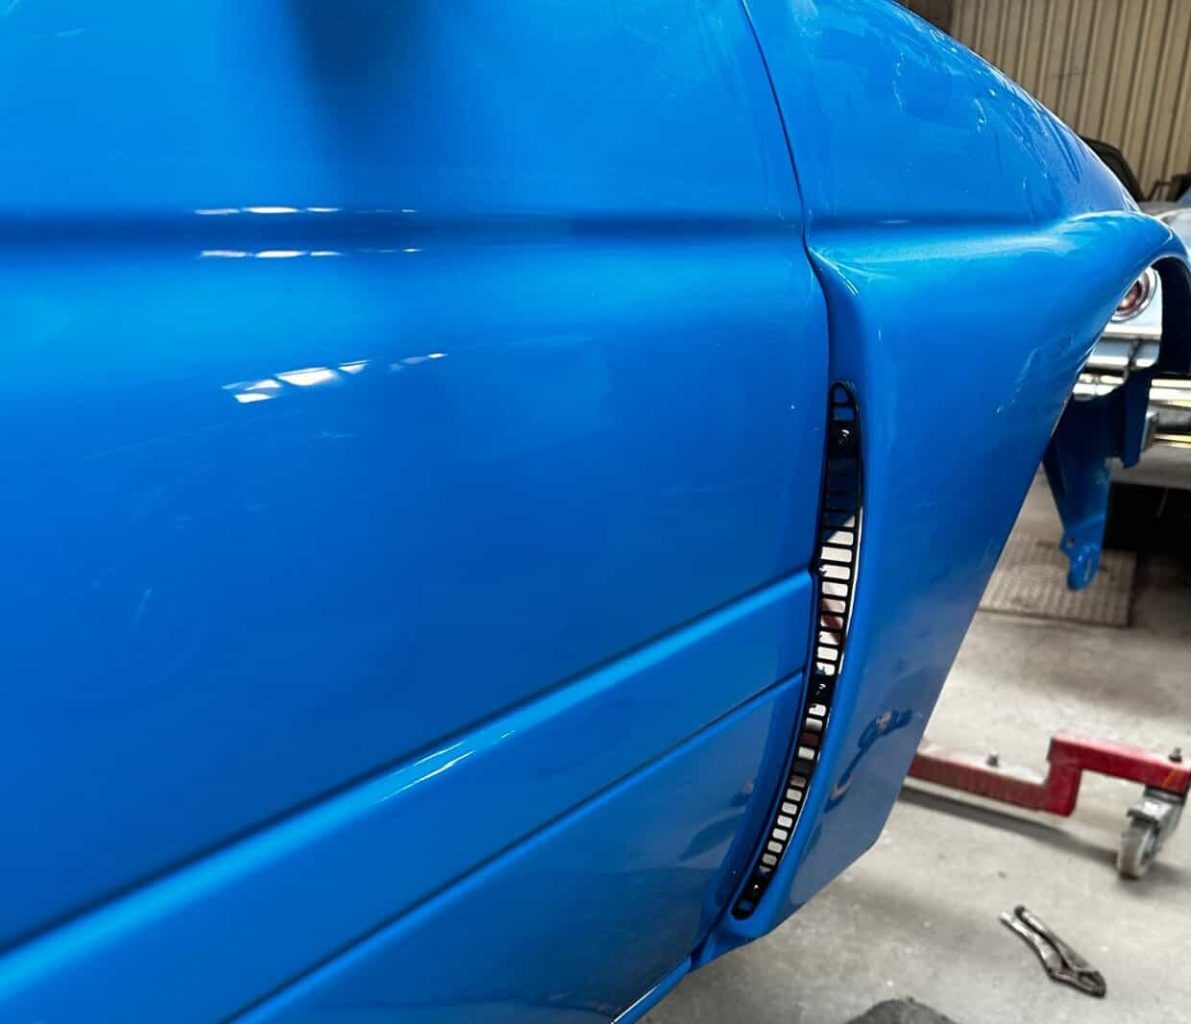
Wings & Side Vent Fitted
The wings went on next, along with the side vent. At this point, you start to see the car retaking shape.
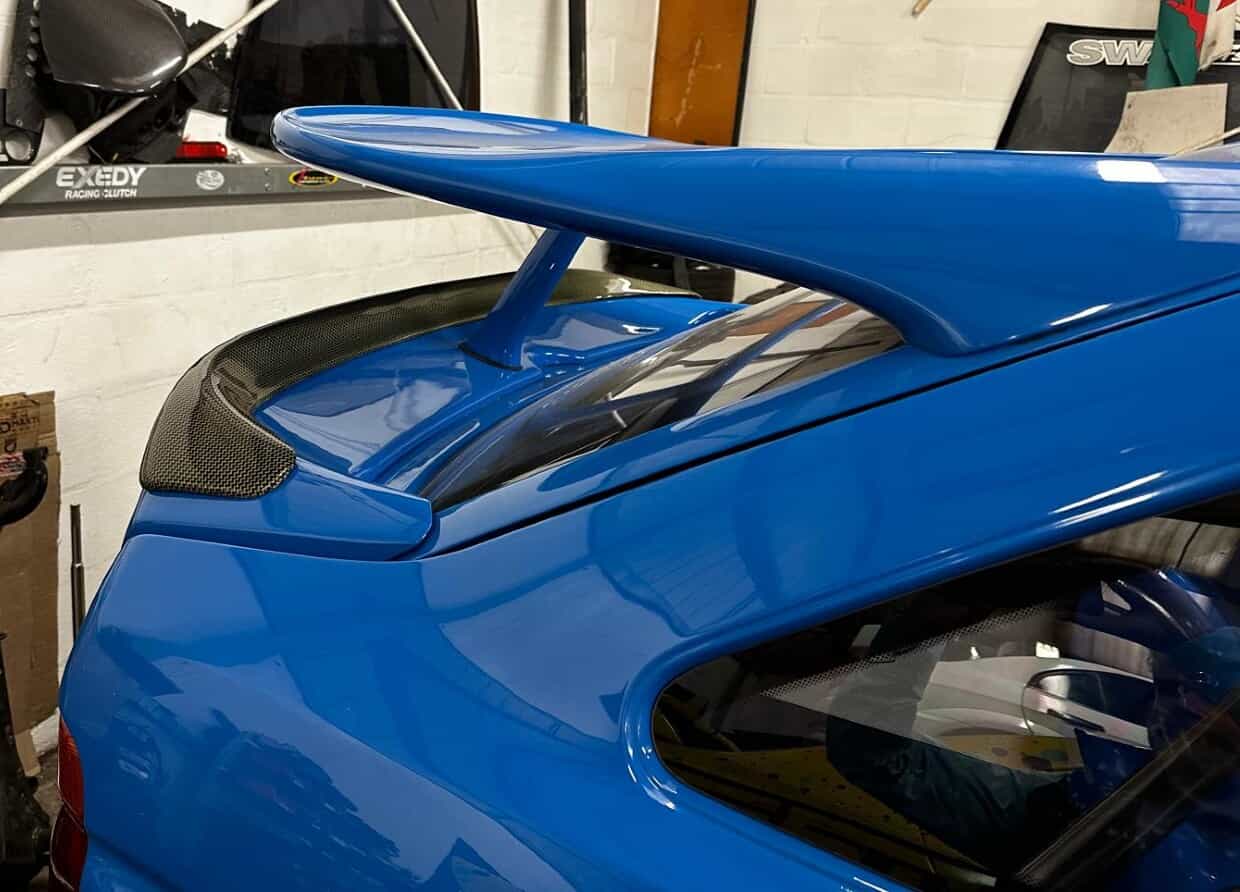
Carbon Roof Fitted
Next up, a serious upgrade – the carbon roof was bonded in place.
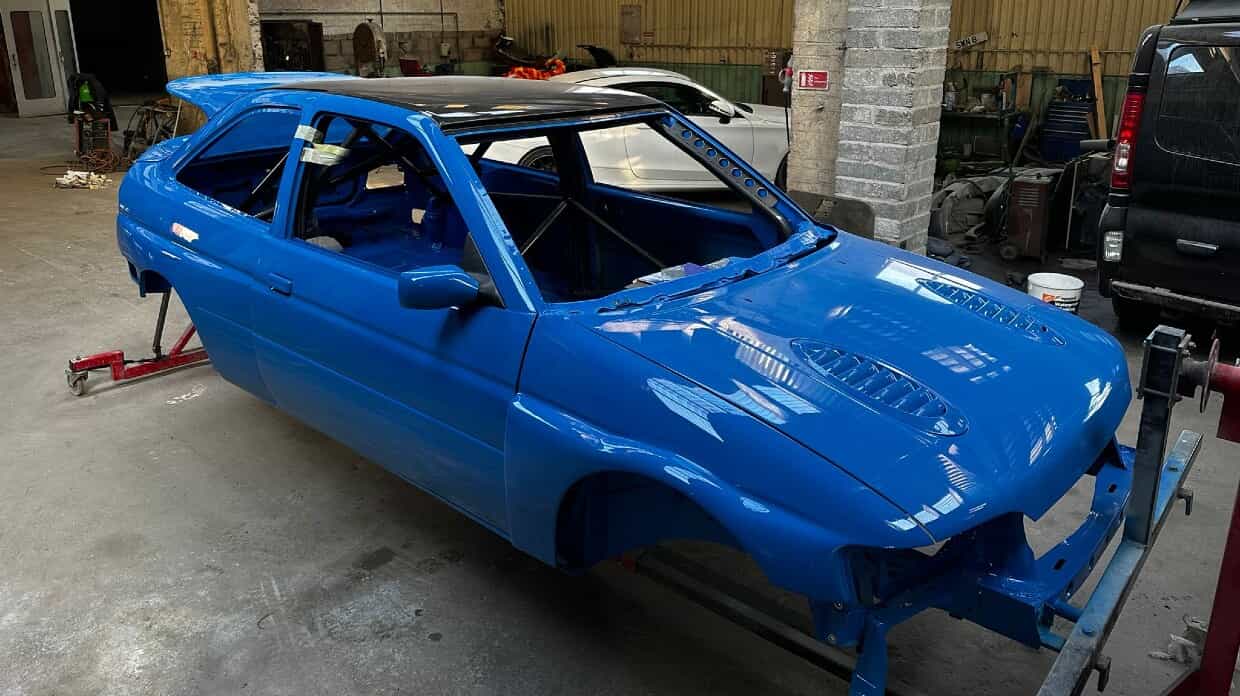
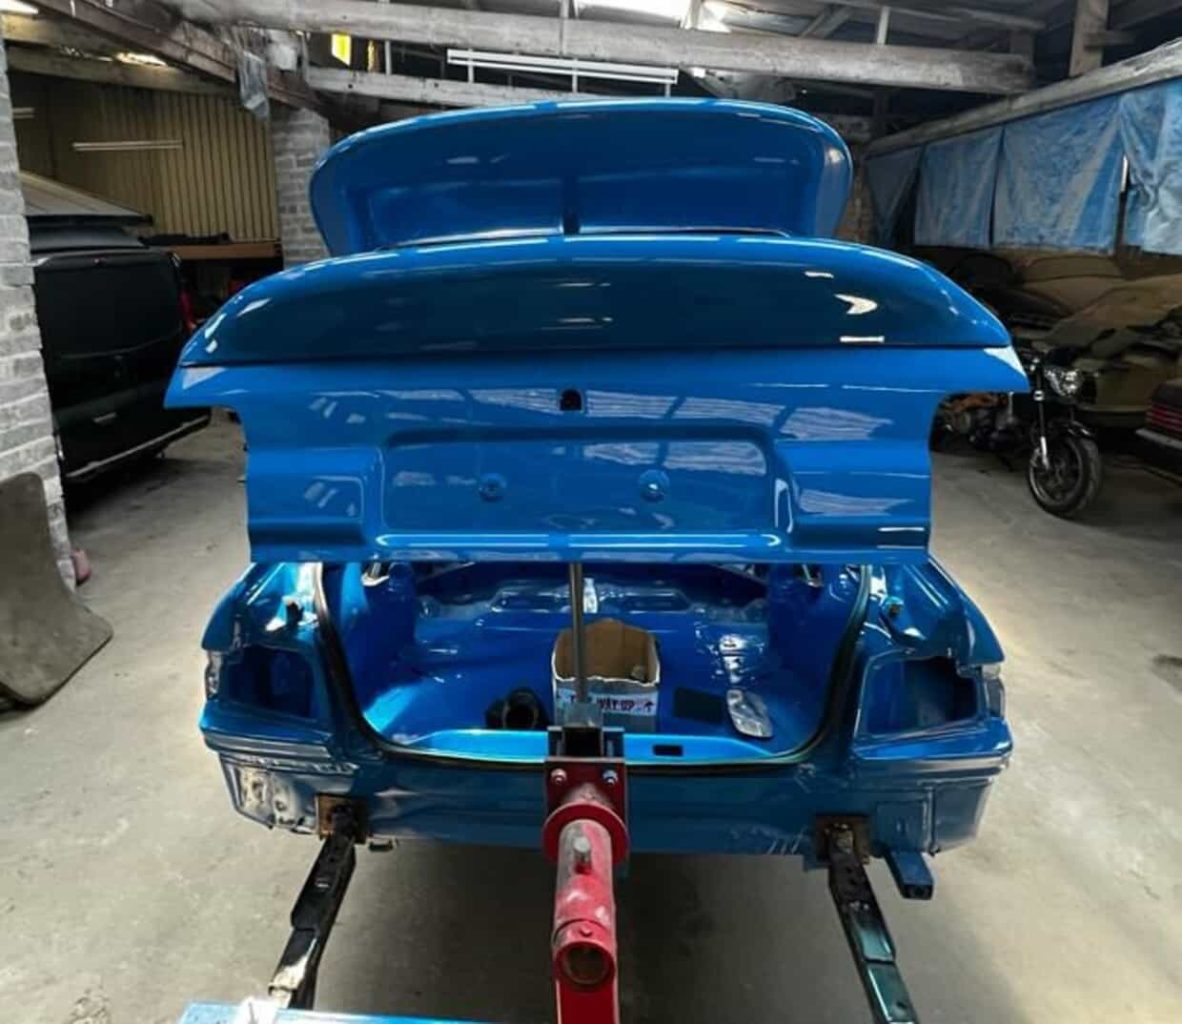
Rear Spoiler & Polycarbonate Windows
We mocked up the rear spoiler and began fitting the polycarbonate windows.
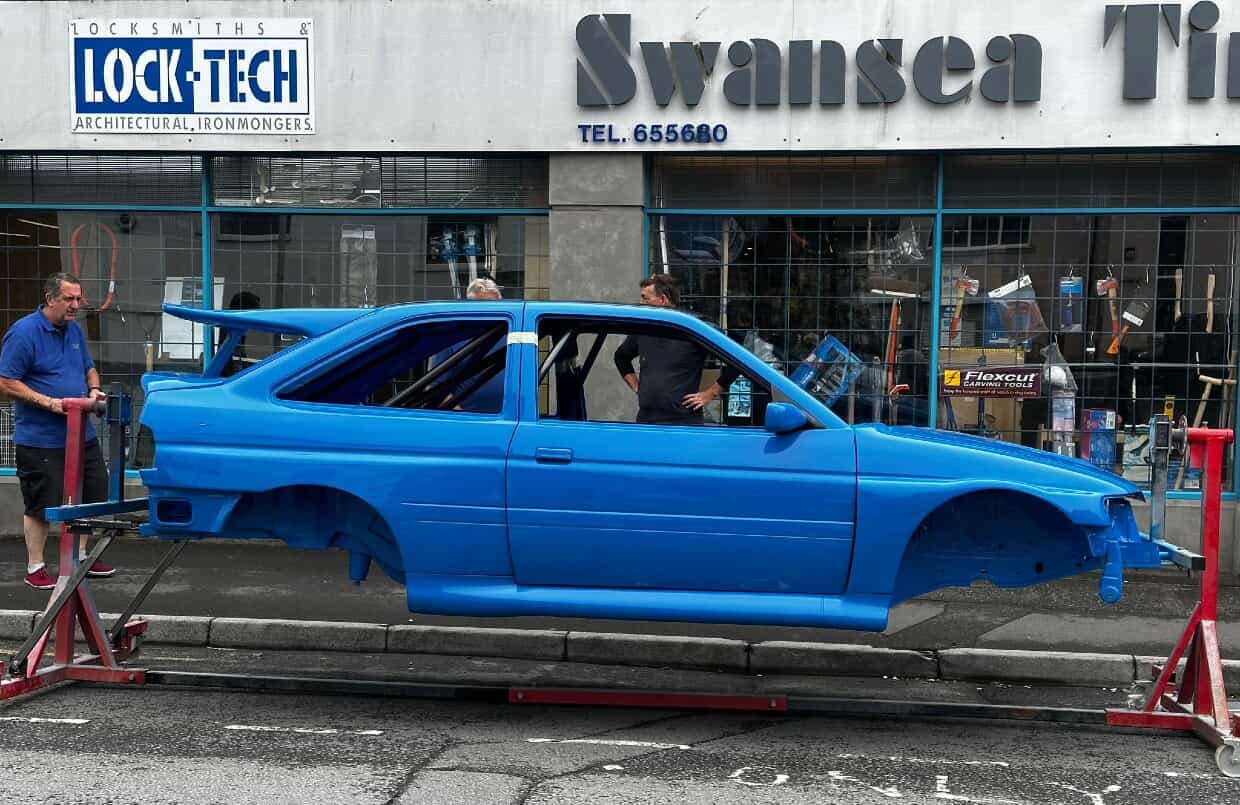
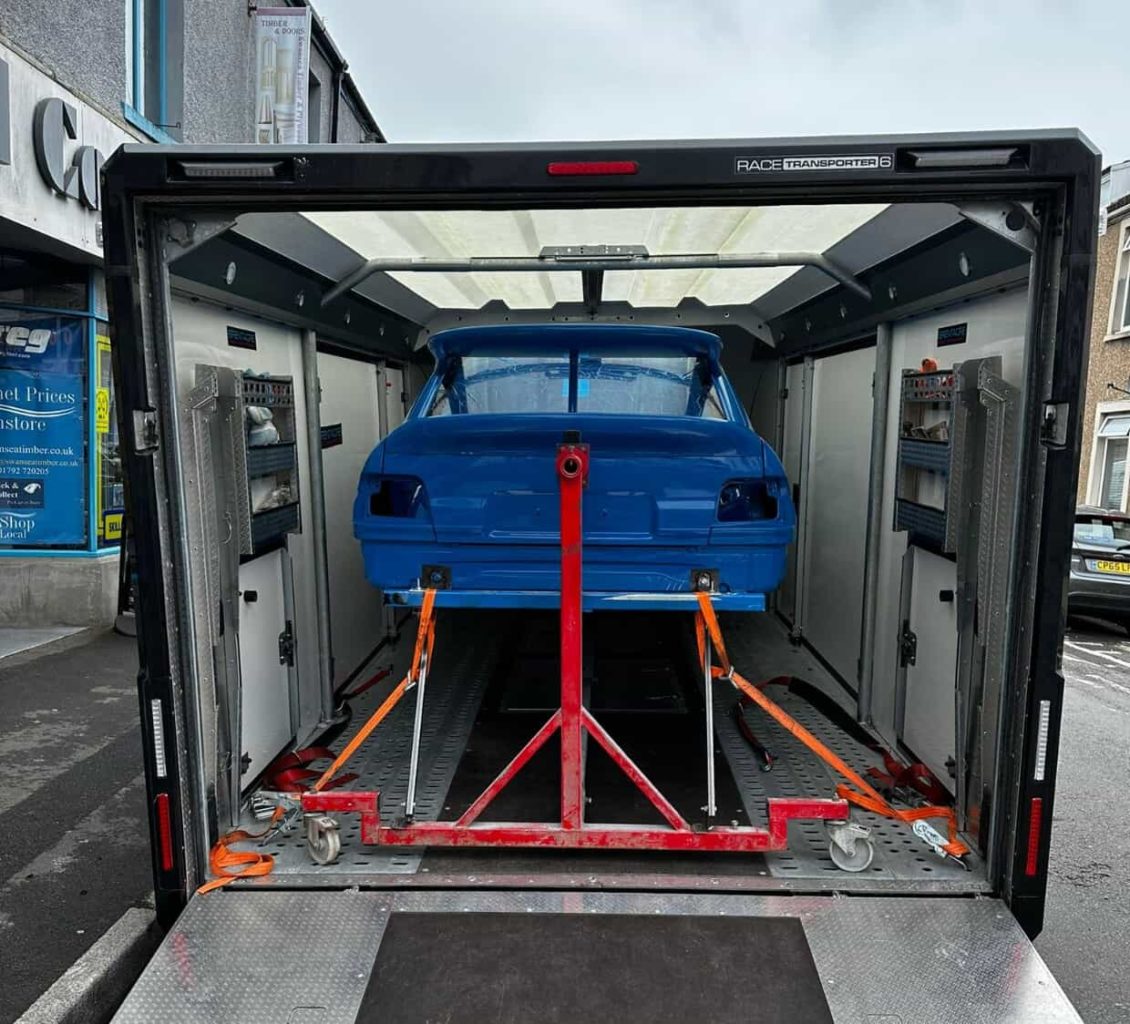
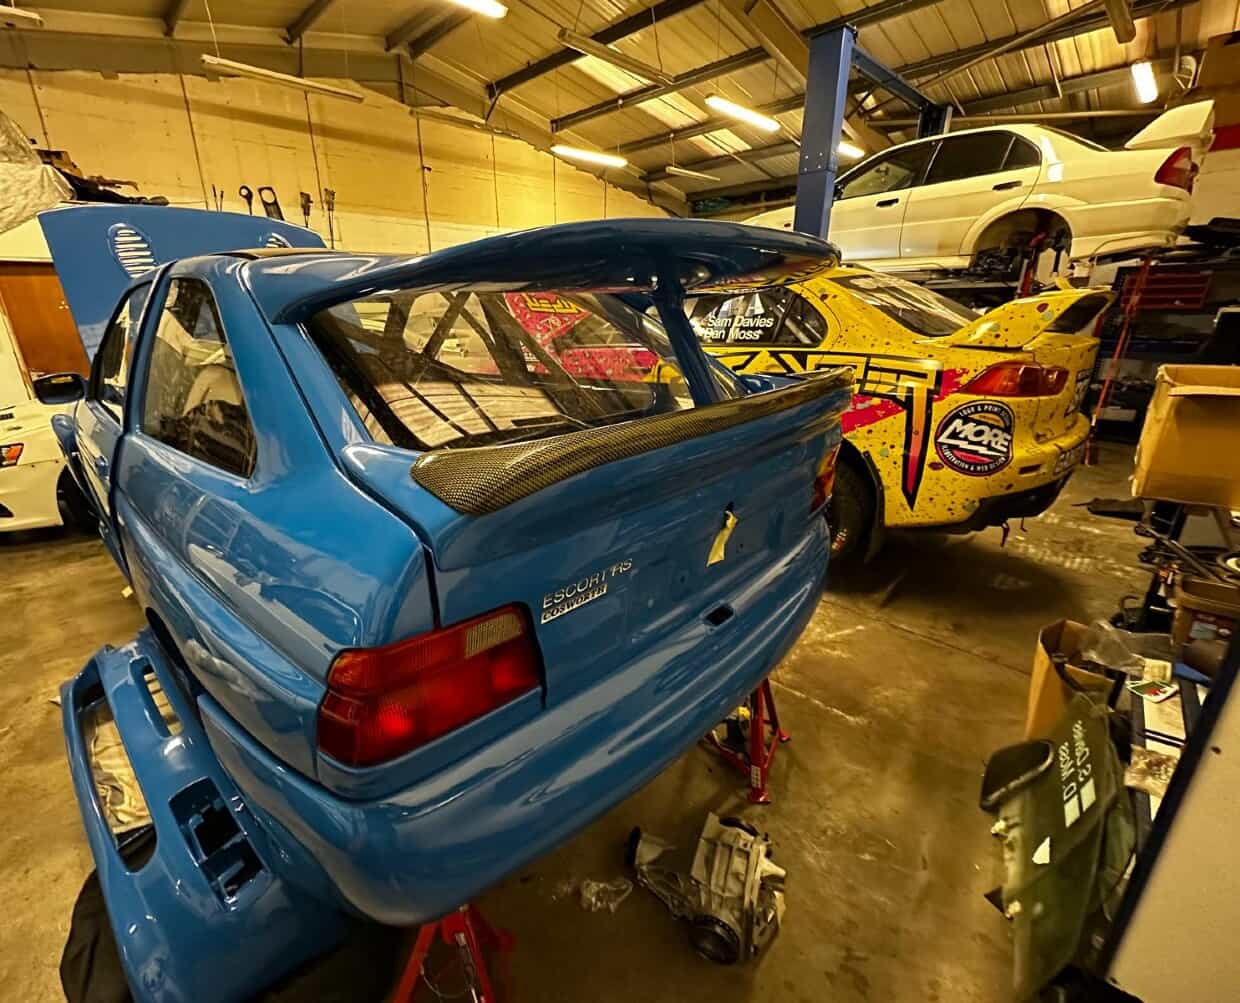
Back On The Road (Well, Kind Of)
For the first time in years, the car left the body shop, but of course, not under its own power, but sitting proudly on a dolly. It was a proper moment seeing it outside again in full colour. The next stop: rebuild.
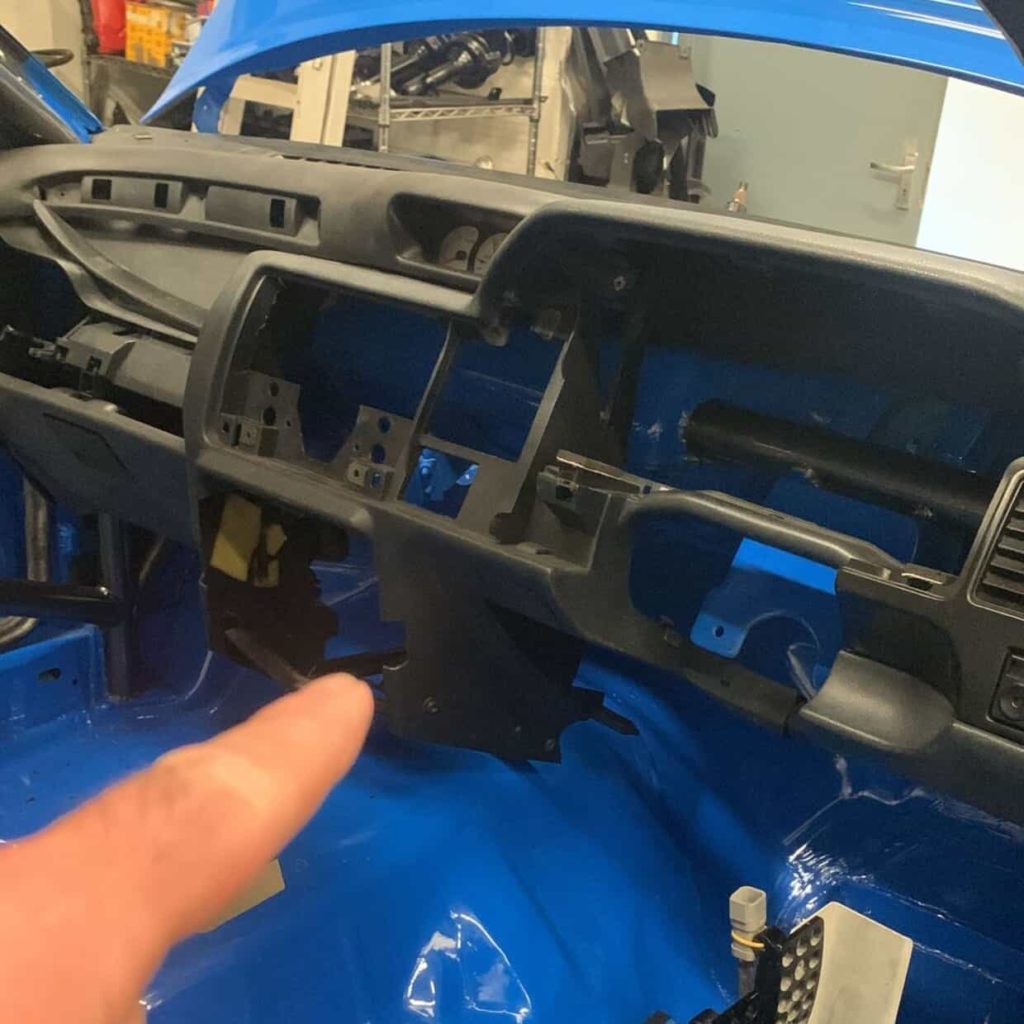
Test Fitting The Dash
Once back in the workshop, we began test-fitting the dashboard and started trimming out anything that wasn’t needed. This part’s all about refining – less clutter, more purpose.
Arrives With Andy: The Parts List Begins
Now in the hands of Andy, the car enters the serious assembly phase. First job: getting the freshly gloss black-painted Morrett headlights installed, a small touch, but one that instantly gave the front end some bite.
Rear Spoiler & Decals Mock-Fitted
We mocked up the rear spoiler (a carbon Kevlar Wolf-style piece) and added the rear decals to get a feel for the final look. Even unfinished, it was already starting to look the part.
From Rolling Shell To Running Gear
With the shell now painted and prepped, it was finally time to turn attention to the mechanicals. Here’s how the performance side of the build is coming together so far.
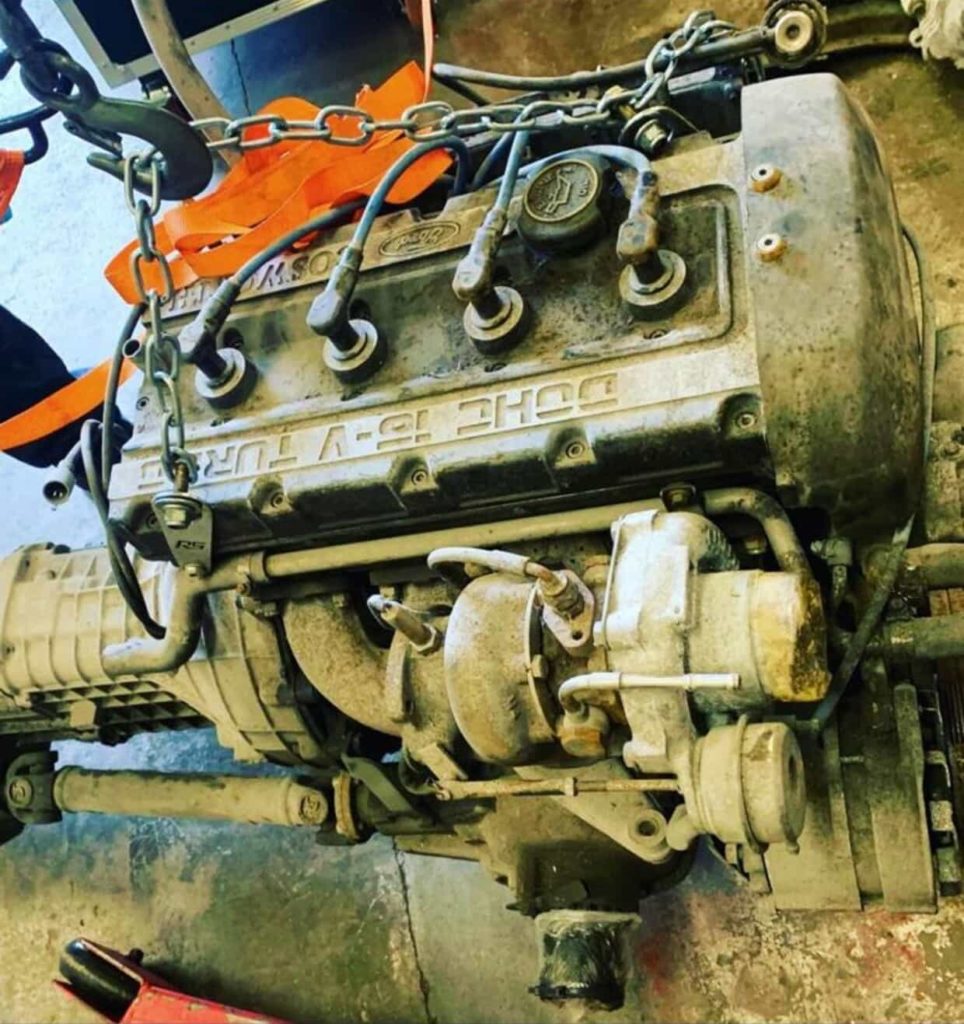
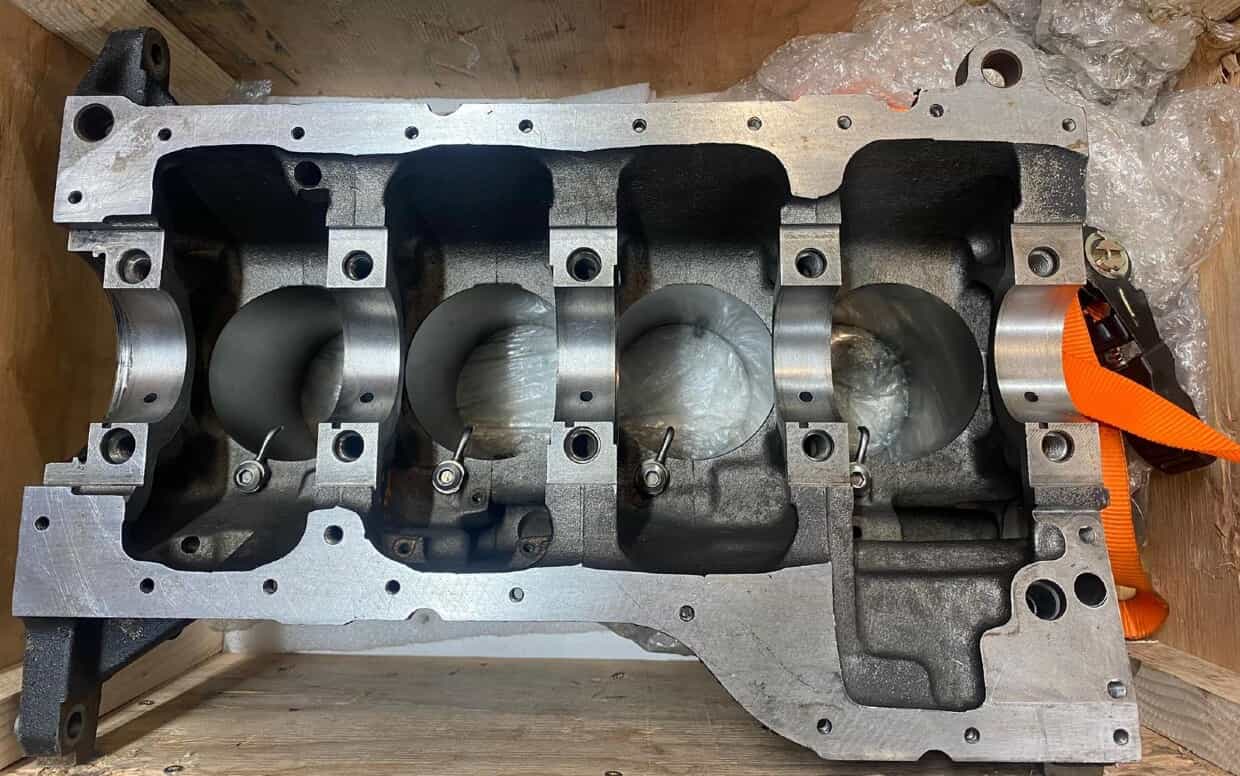
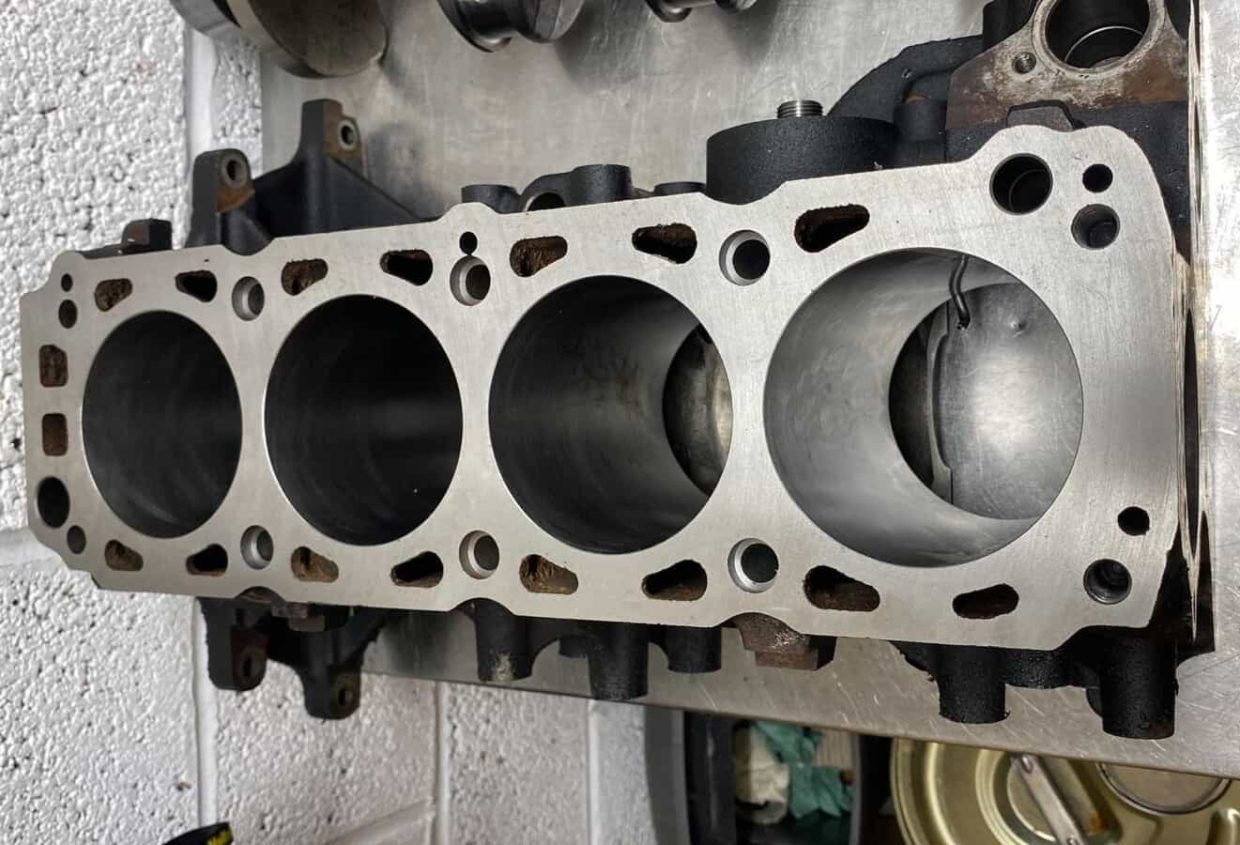
Original YB Cosworth Engine
The original YB engine was still running around 400bhp, but it was definitely looking tired. Time hadn’t been kind to it, and it was ready for a proper rebuild. It’s now on its way to PJ Motorsport, who’ll be stripping it down and refreshing it to the highest spec.
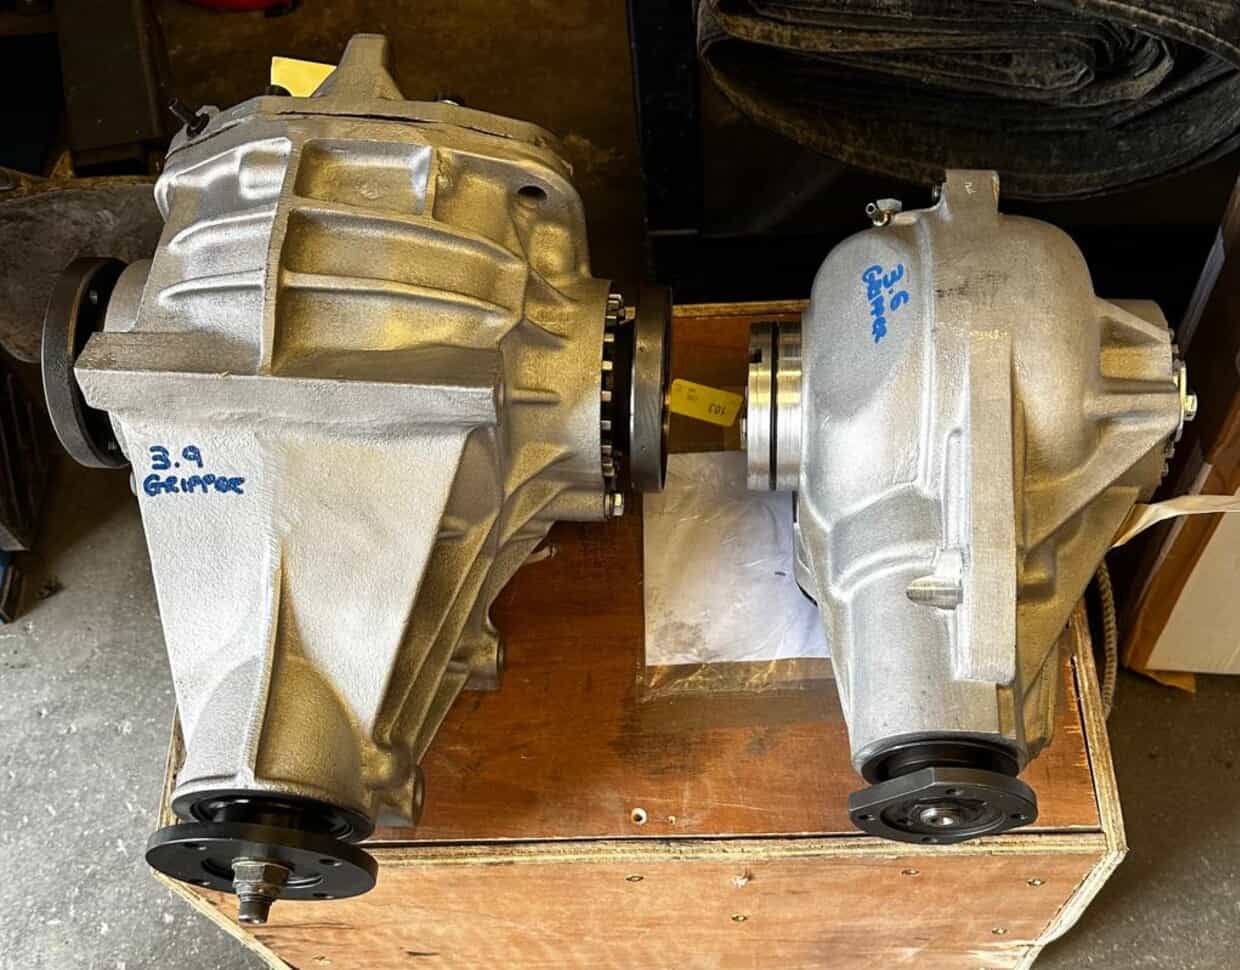
Upgraded Diffs Installed
To handle the power and improve traction, we’ve upgraded the differentials. These should make a serious difference in both drivability and durability, especially when everything’s dialled in.
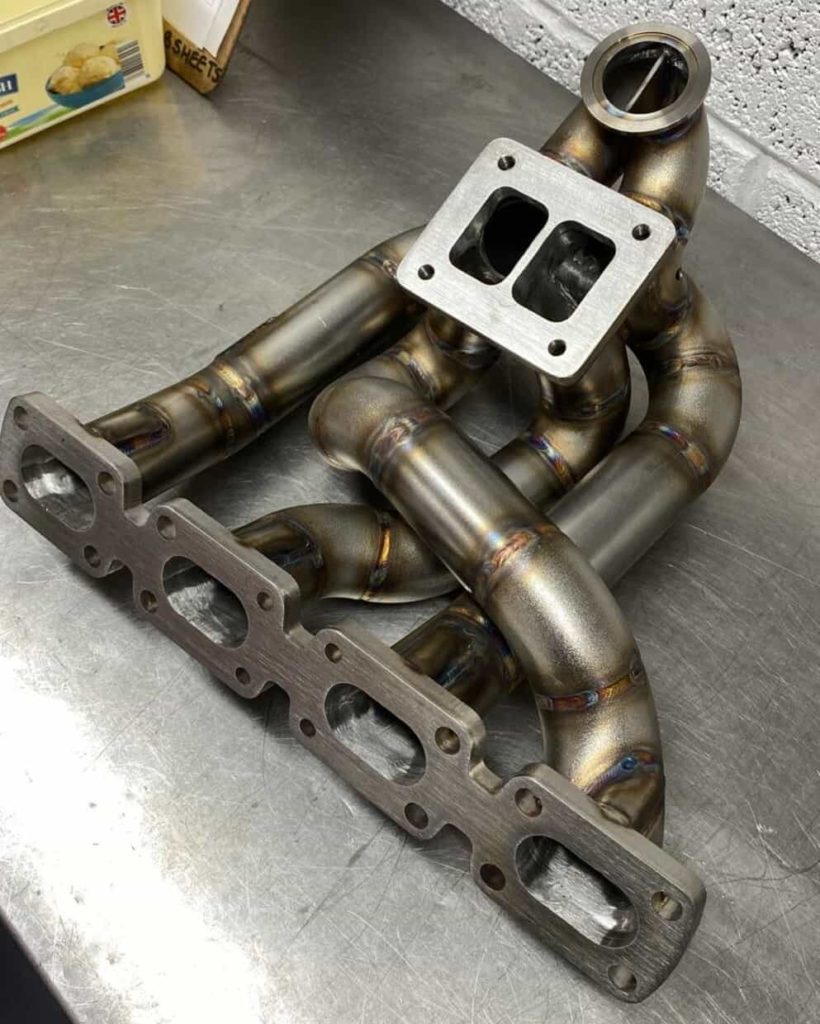
Custom Manifold by EL Performance
Next up, serious hardware. EL Performance supplied the custom-fabricated manifold (absolute artwork in stainless). It’s worth noting that its design is not just for aesthetics, as it has been optimised for optimal flow and proper performance.
New Turbos Delivered
The turbos have arrived. These will form the backbone of the boost setup, and there will be more details to come once they’re mounted and tested, but they’re spec’d for serious output.

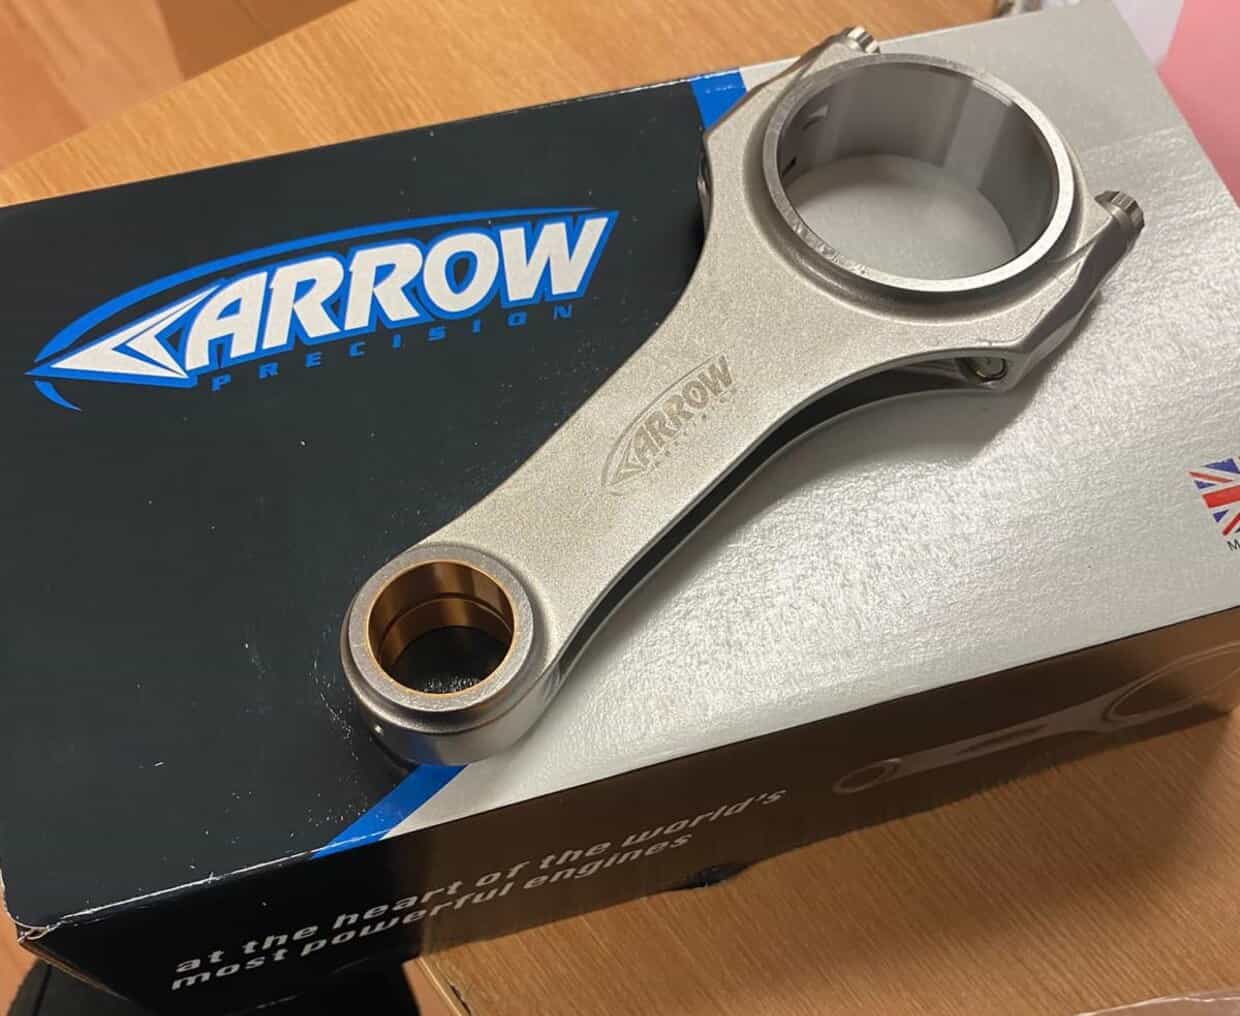
Rods
Forged rods are now in hand. A crucial piece of the bottom end build, especially considering the power we’re aiming for and the way this car will be driven.
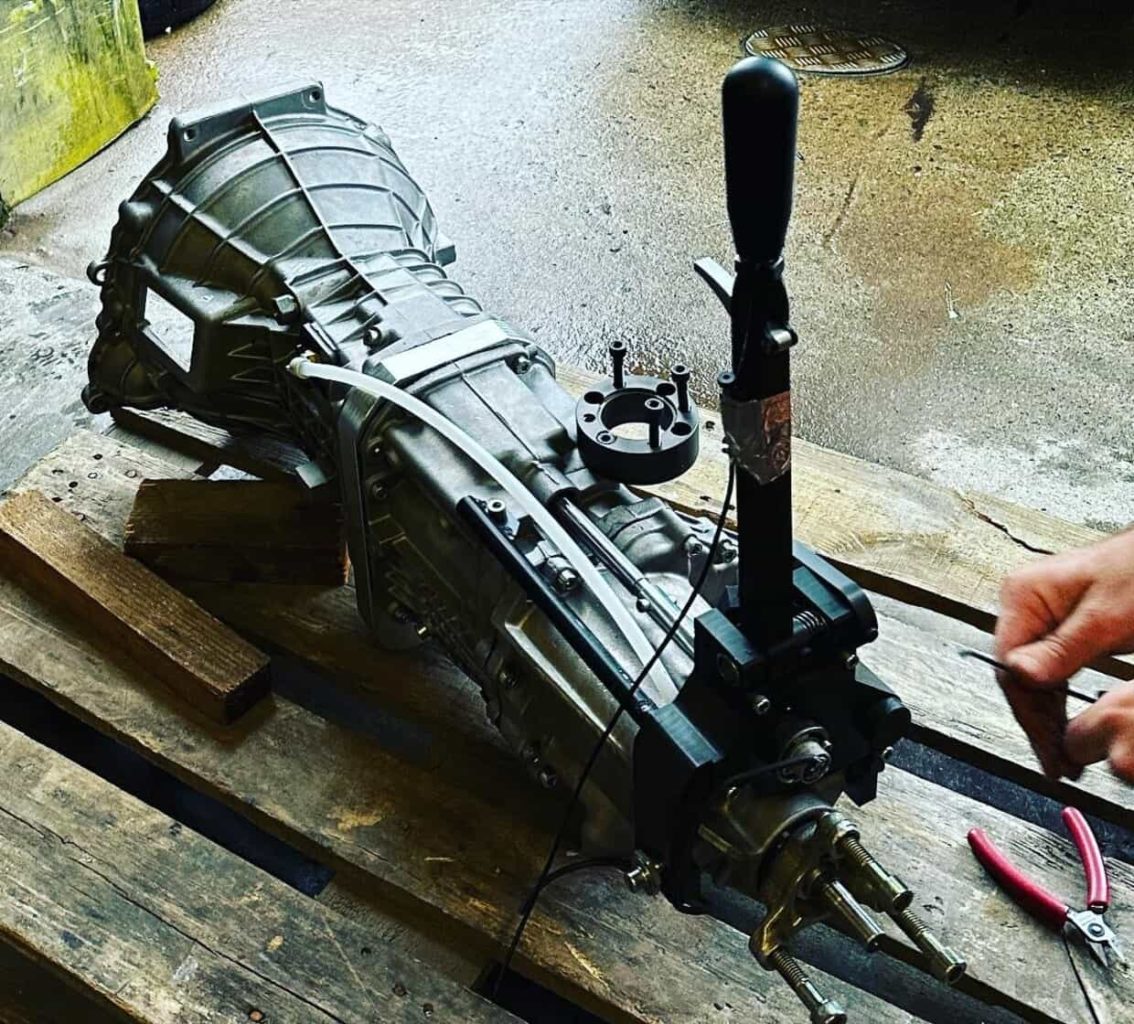
Oppliger Sequential With Paddle Shift Plans
One of the biggest upgrades has arrived: the Oppliger sequential gearbox. The plan is to run this with paddle shift, bringing true motorsport functionality into the build and making it far more responsive than any standard setup.
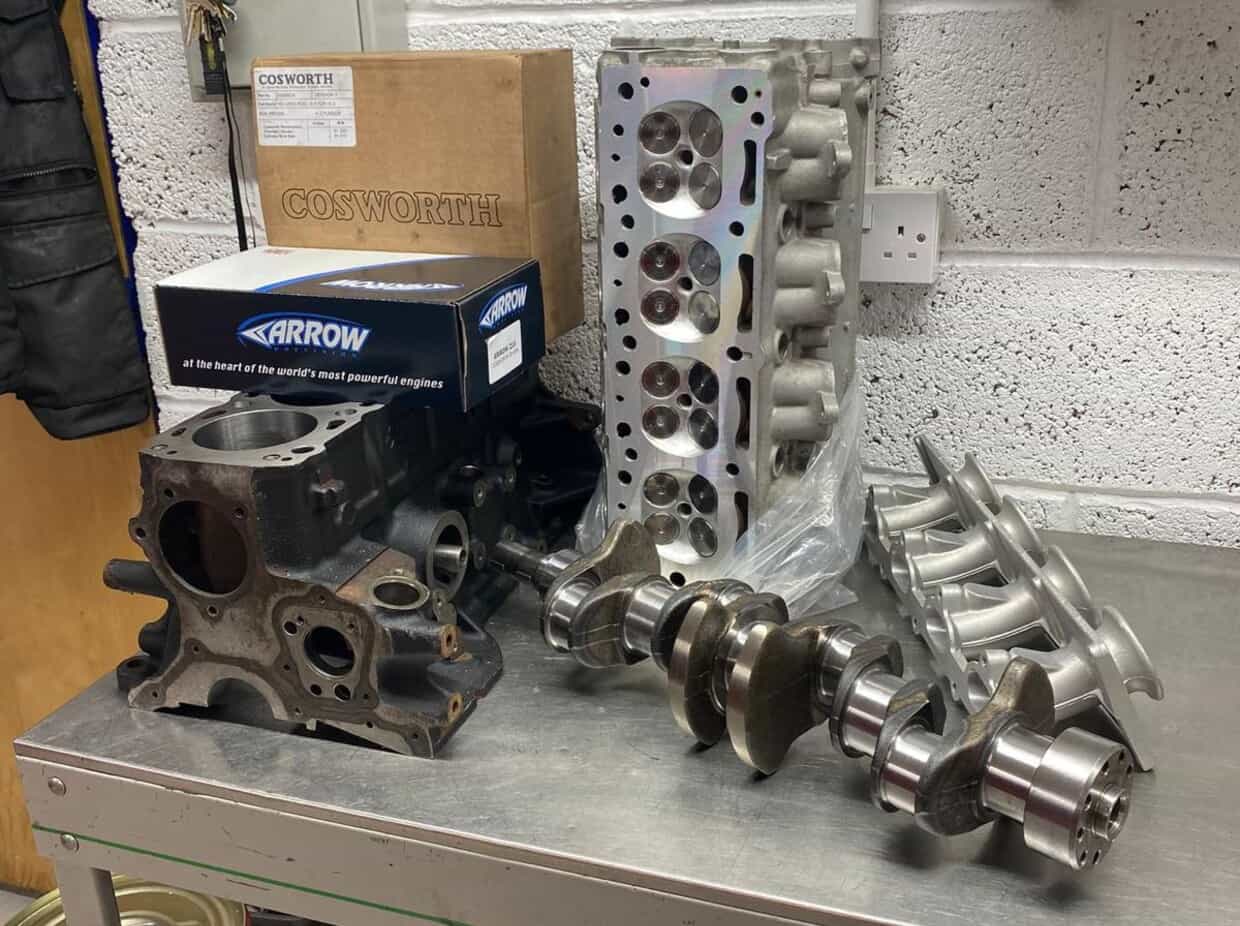
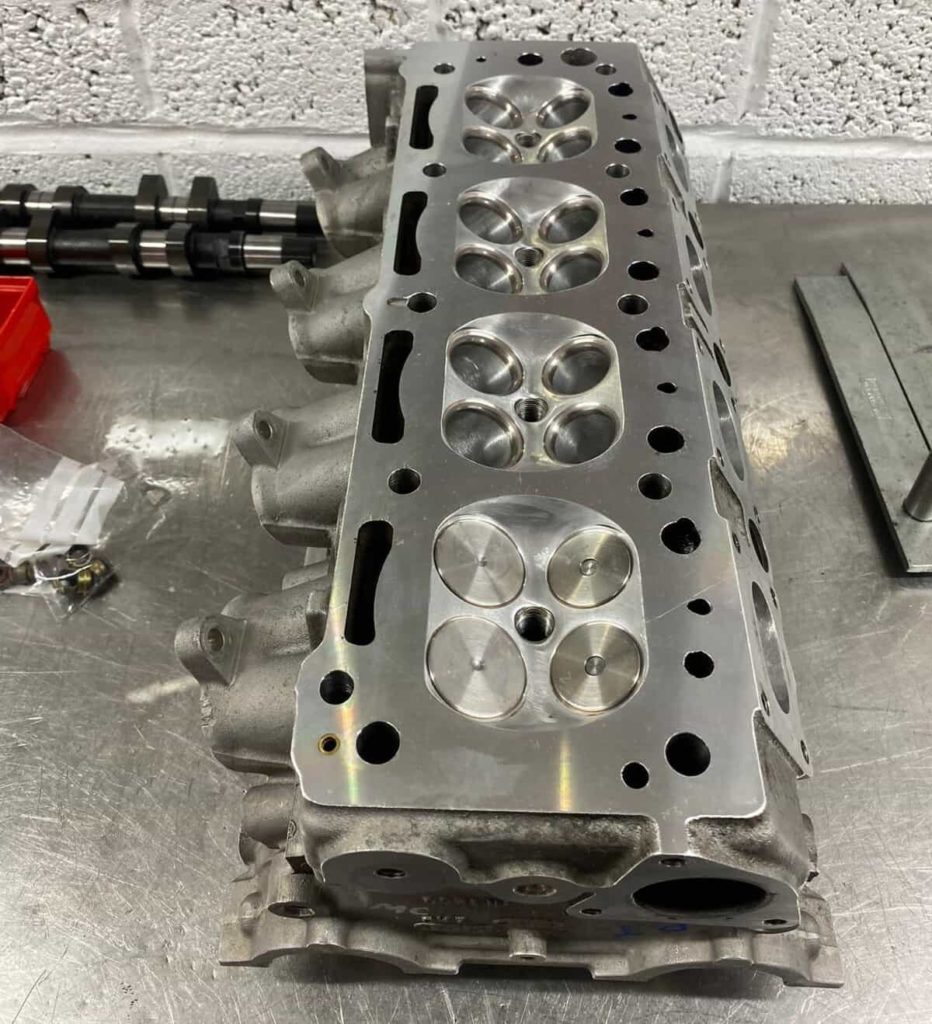
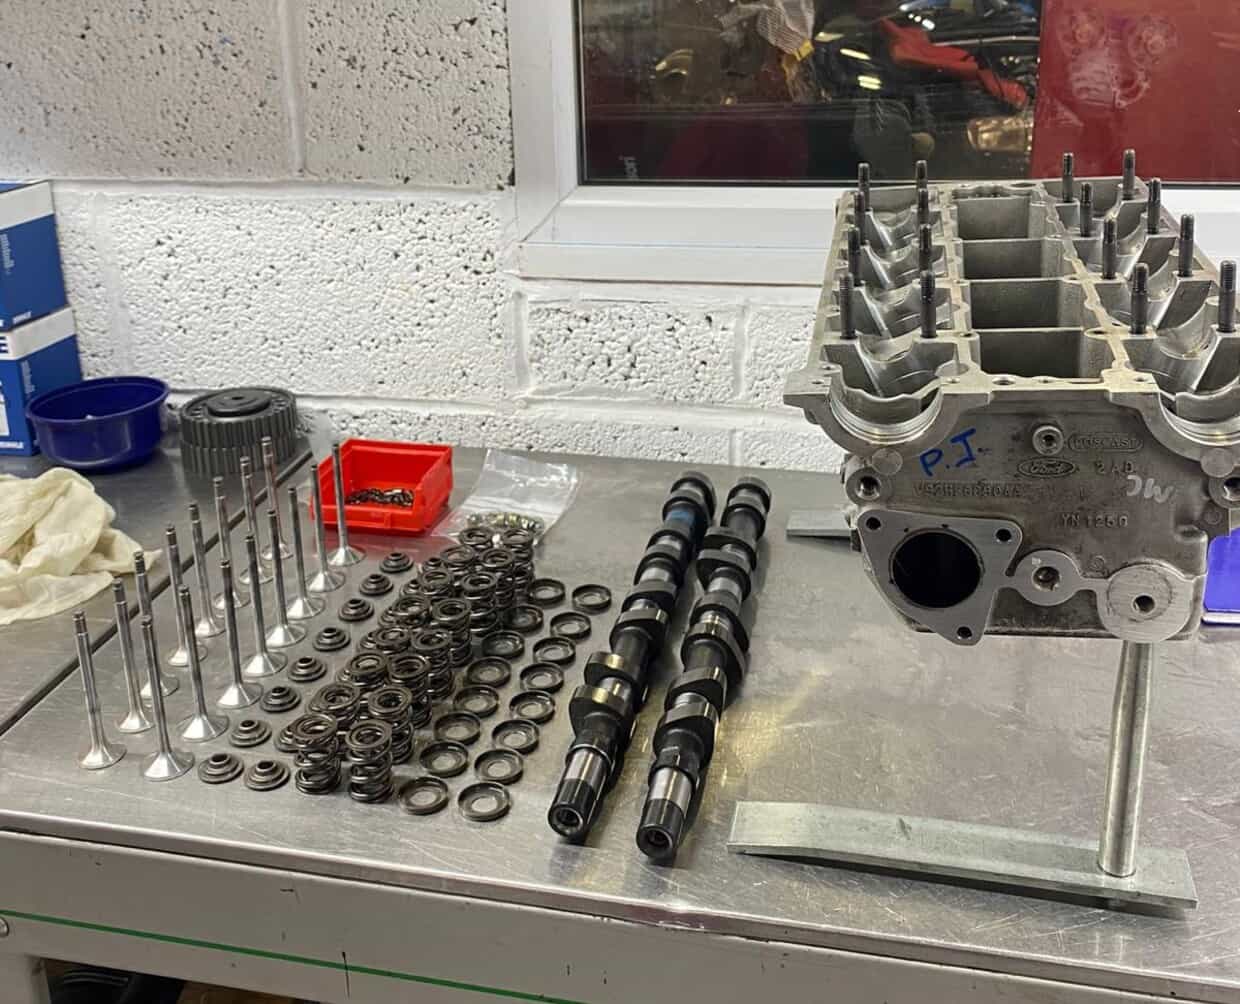
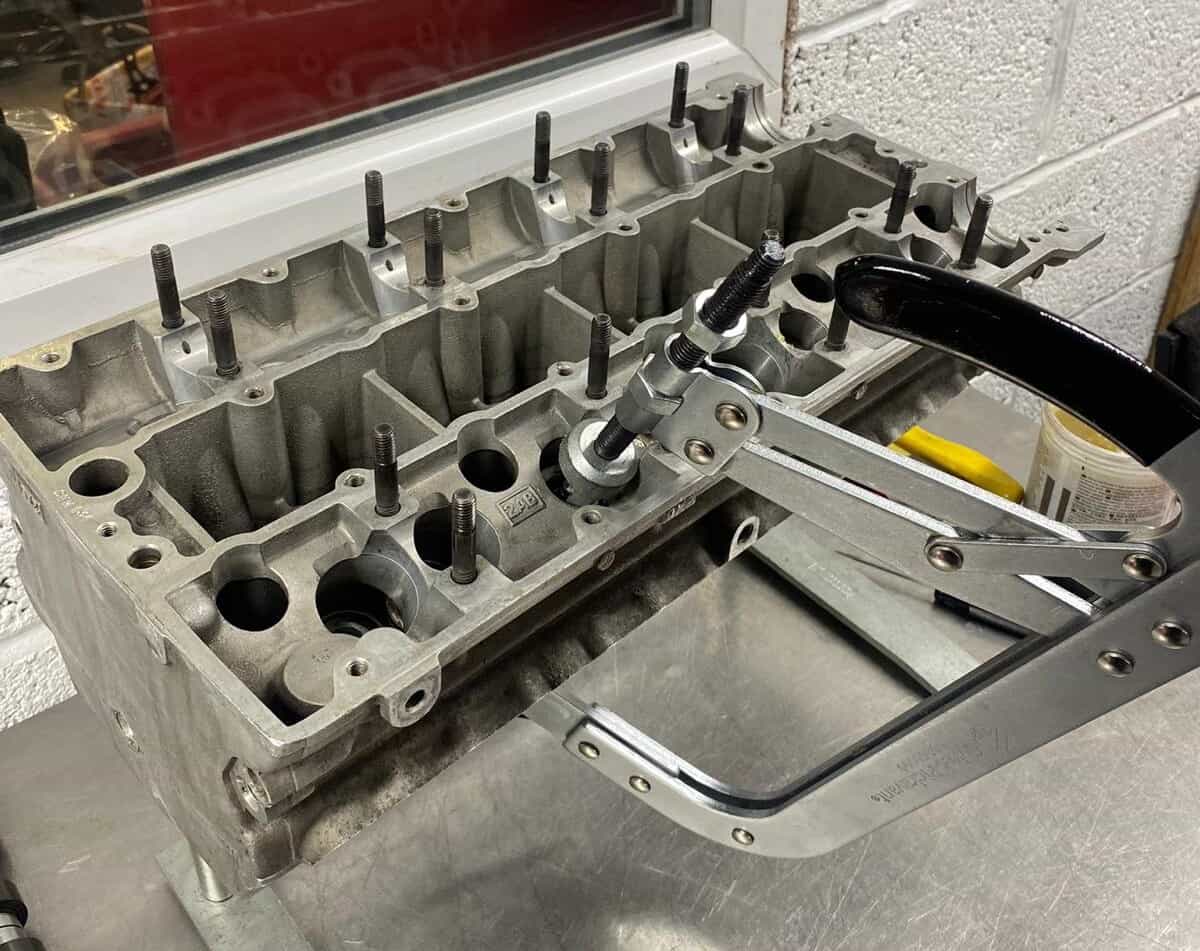
Engine Rebuild Underway
The rebuild is in full swing over at PJ Motorsport. The photos below show the strip-down and build-up process, including the painted block.

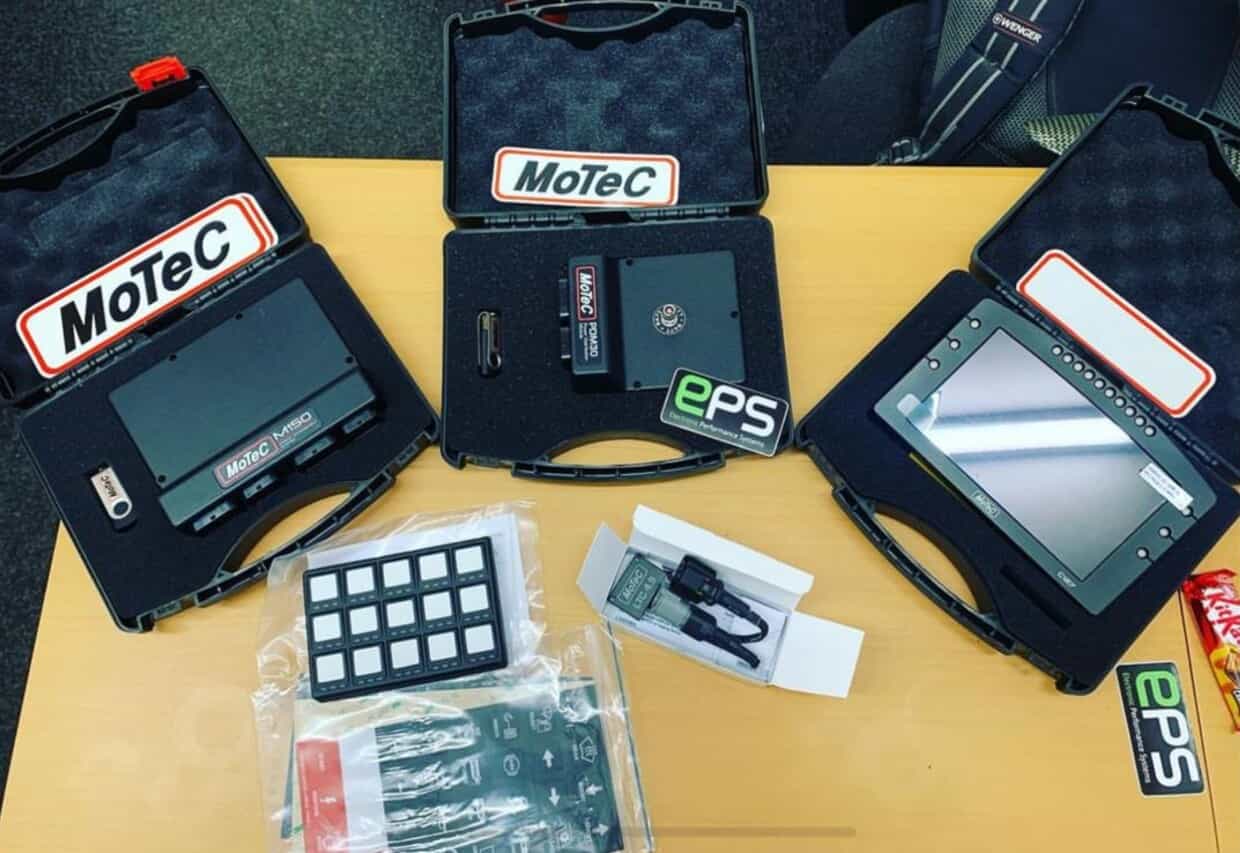
MoTeC ECU, Display & Control Pad
MoTeC electronics will handle everything from engine management to driver display and inputs. With the ECU, digital dash and control pad all going in, the car’s electronics will be fully programmable and motorsport-grade from day one.
Fixing The Flaws, Building The Dream
After all these years of building the car, I think it’s worth showing exactly what’s been done in some detail, so you can see the journey we’ve been on together and that my dream has almost become reality. I’ll be updating this post as the build evolves with more photos, more progress, and plenty more Cossie goodness still to come.
Want To Be Featured?
Got a dream build of your own? We want to hear about it. Whether it’s a concours classic or a scruffy track car, if it’s got a story – we’d love to tell it.
Get in touch with us or tag our Instagram
